Links


Summary
Description ⤒
Visibility Set Filters is a Blender addon which aims to help the versioning during a production workflow.
It can be applied to any objects (geo, camera, lights, etc) or collections (think of filtering inheritance).
It is asset browser proof, which was the main purpose actually ^^.
Basically, a modeler can work on a final high poly character, in a file which contains a GPencil draft version of the character, for Storyboard purposes, and a low poly character (with its rig, same as the high poly one), so an animator could already work on the anim without experiencing huge lags...
You can add any new filter (or setting) to an object, and set the desired visibility.
The addon will gather every "filter name" and then will let you choose which one you want to see in the viewport and use for the rendering.
So when you import (append or link) your asset into a new scene, if matching names were used, you can now globally switch without any effort between any config.
It also nicely works with Scene strips in the VSE, where you'll be able to directly switch between any desired config 😉
This addon doesn't interfere with Scenes management or ViewLayers, so you can work as usual, split into different render layers etc...
Installation & Update ⤒
Installing ⤒
The addon is installed just like any regular Blender addon:
- download the latest version of the addon, do not uncompress it
- go to Blender’s user preferences, from the file menu, or shortcut CTRL + ALT + U on Windows
- open the Addons tab
- click Install add-on from file at the bottom
- navigate to the downloaded file and select it
- the addon is then installed
Updating ⤒
Most of the time, you should either uninstall the old version first or remove it rather than “Overwrite” it, before installing the new one.
Otherwise internal conflicts may happen within Blender.
In either case, you may need to restart Blender if you experience problems once the new version is installed, to make sure nothing from the old version remains in memory.
User Interface ⤒
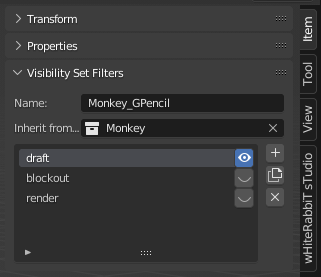
Object N-Panel ⤒
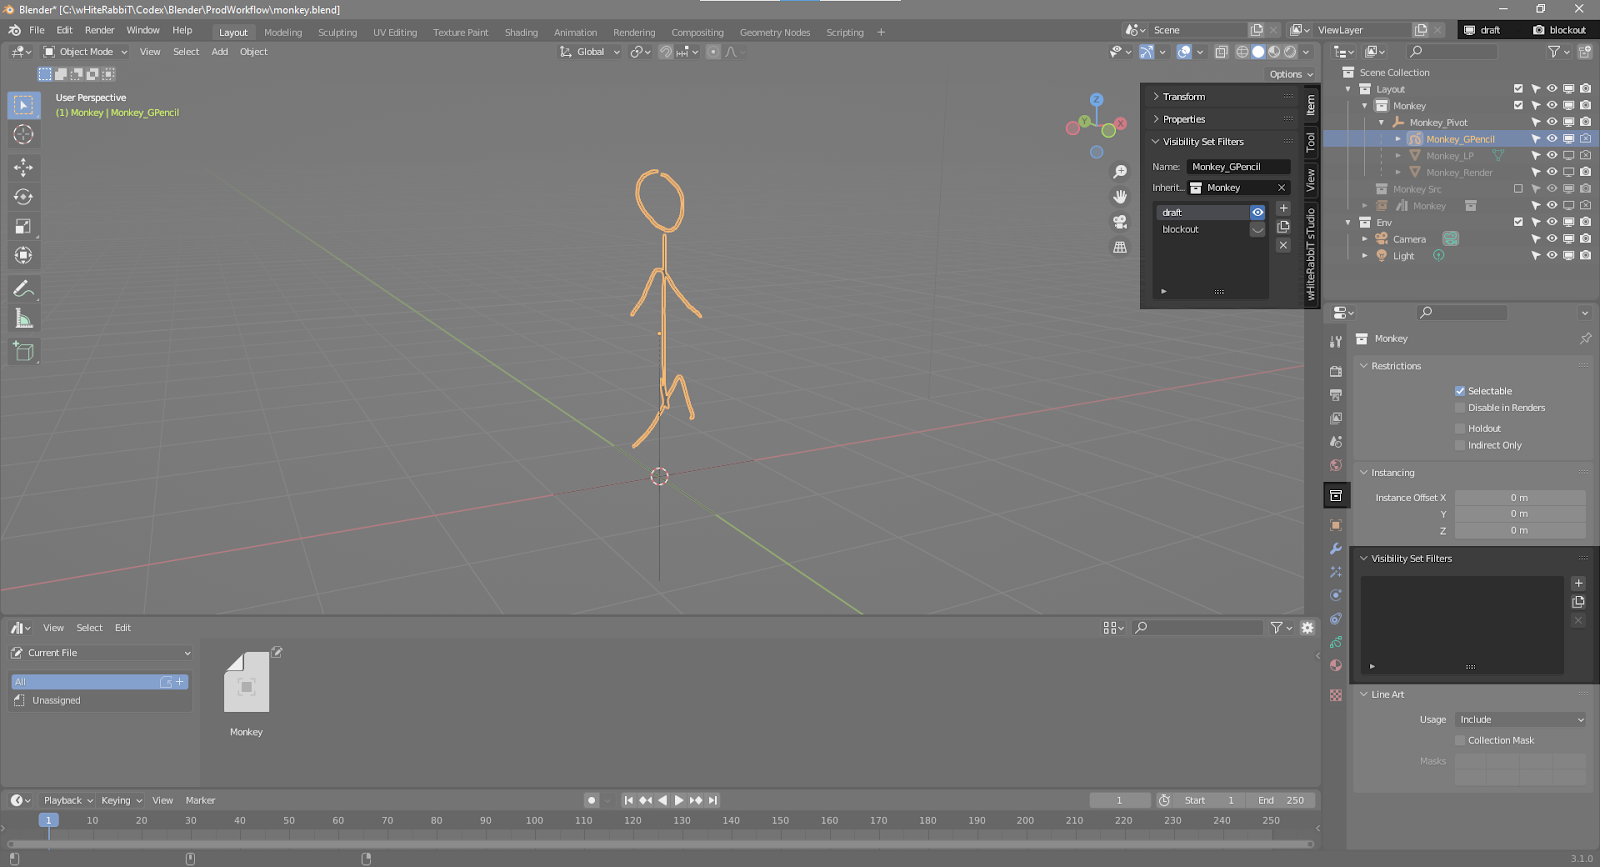
When an object is selected, you will find a new panel named “Visibility Set Filters” under the “Item” N-Panel.
Name
Mostly a check of which object is active, it can also serve as a shortcut for renaming the object.
Inherit from collection
Collection from which the visibility sets will inherit from.
Keep in mind that if you define any visibility set rules in the following list, they will have priority and override each setting.
Visibility sets list
From here you can set each visibility rule for each filter.
- + will add the current selected filter for the viewport3D.
- New will give you the possibility to create a new filter or add an existing one.
- x will remove the current filter from the list. The deleted filter won’t be removed from other objects or collections.
You can edit the name of a filter by double clicking on it.
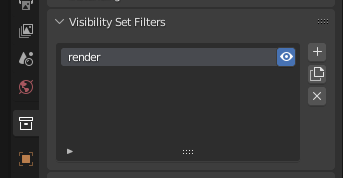
Collection Properties ⤒
The same filtering process can be done at a collection level.
It works exactly like the Visibility sets list from the object Item panel.
Top Bar ⤒
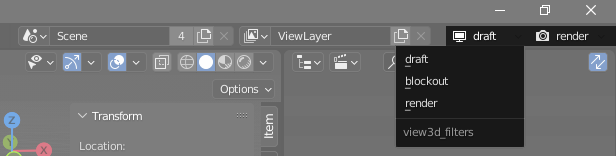
In Blender Top Bar, you will find two new dropdowns, one used for the viewport3D, the other for rendering.
From here, you can decide which filter should be active just by selecting it.
They’re totally independent from each other so for example if you selected “viewport3D - draft” and “render - render” you will only see objects filtered by “draft” setting on the viewport3D but if you do a render you will actually render objects filtered by “render” setting.
Workflow ⤒
General ⤒
The main idea behind these filters is to give the possibility to work on separate production types.
For instance, if you’re working on your storyboard, you would have a light scene, without a lot of details, so you can create a filter for that view, which I personally called “draft”.
If you’re an animator, you probably won’t be willing to deal with a high poly character nor complex environment, and so will use another filter, which I called “blockout” here.
It is completely up to you to create your own filter relevant to your production workflow.
The only advice is to use the same names shared between blender files so you can, once linked in a new blender file, easily switch between your filters.
Those filters were created with that pipeline in mind but could probably be used for other purposes, this is up to your imagination ;).
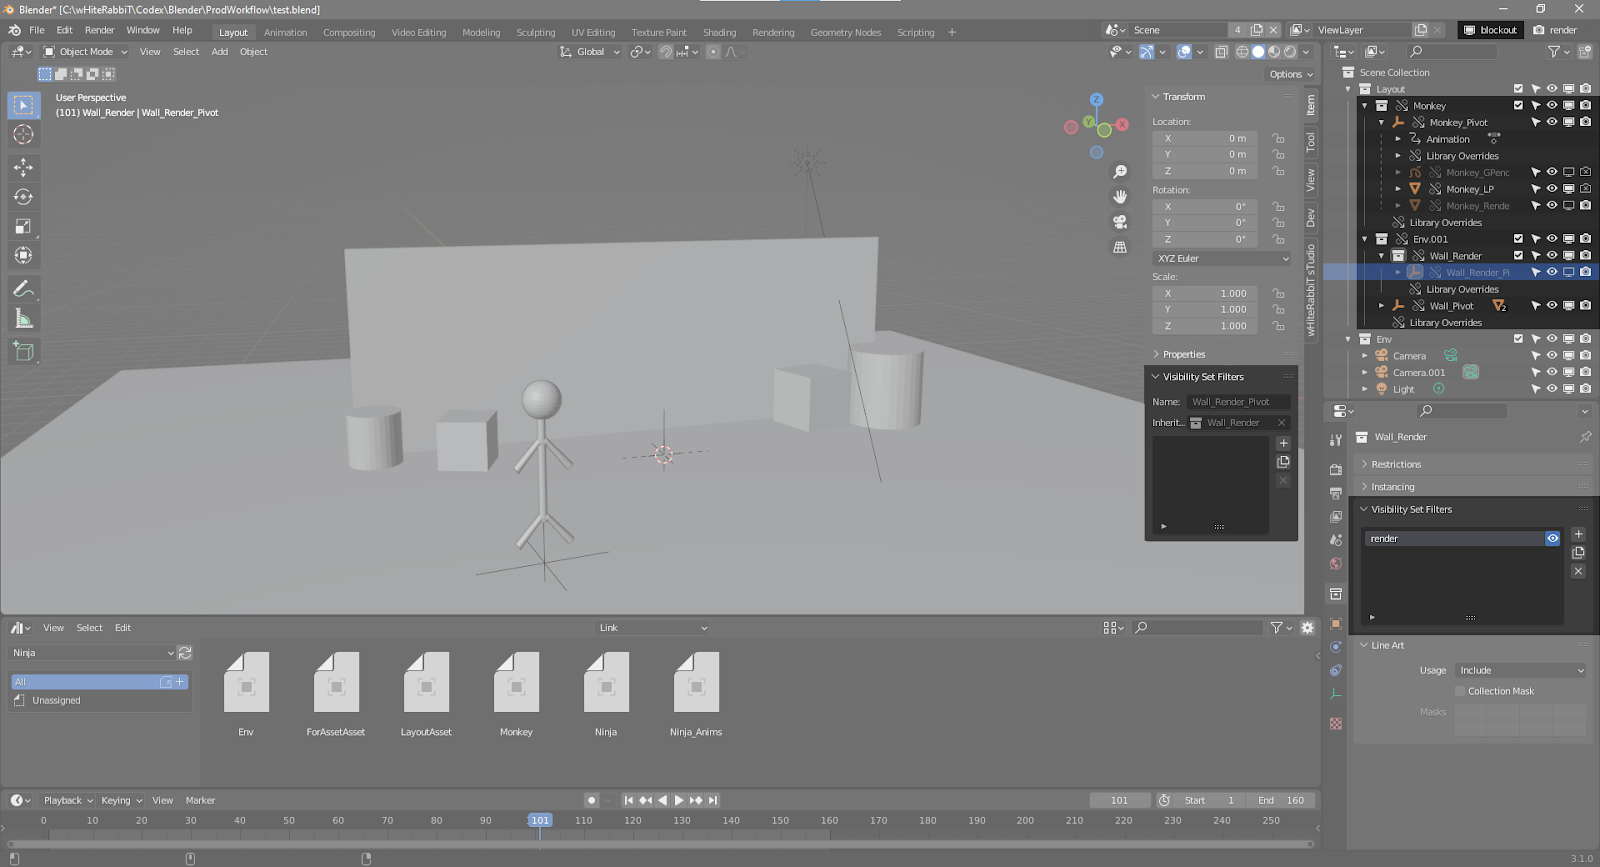
Linked Assets ⤒
As mentioned in the general workflow part, these filters will be accessibles when linked into another blender file.
Note that you will have to use overrides if you need to change them from there.
That can be done by right clicking on an object in the outliner, then “ID Data > Make Library Override Hierarchy”.
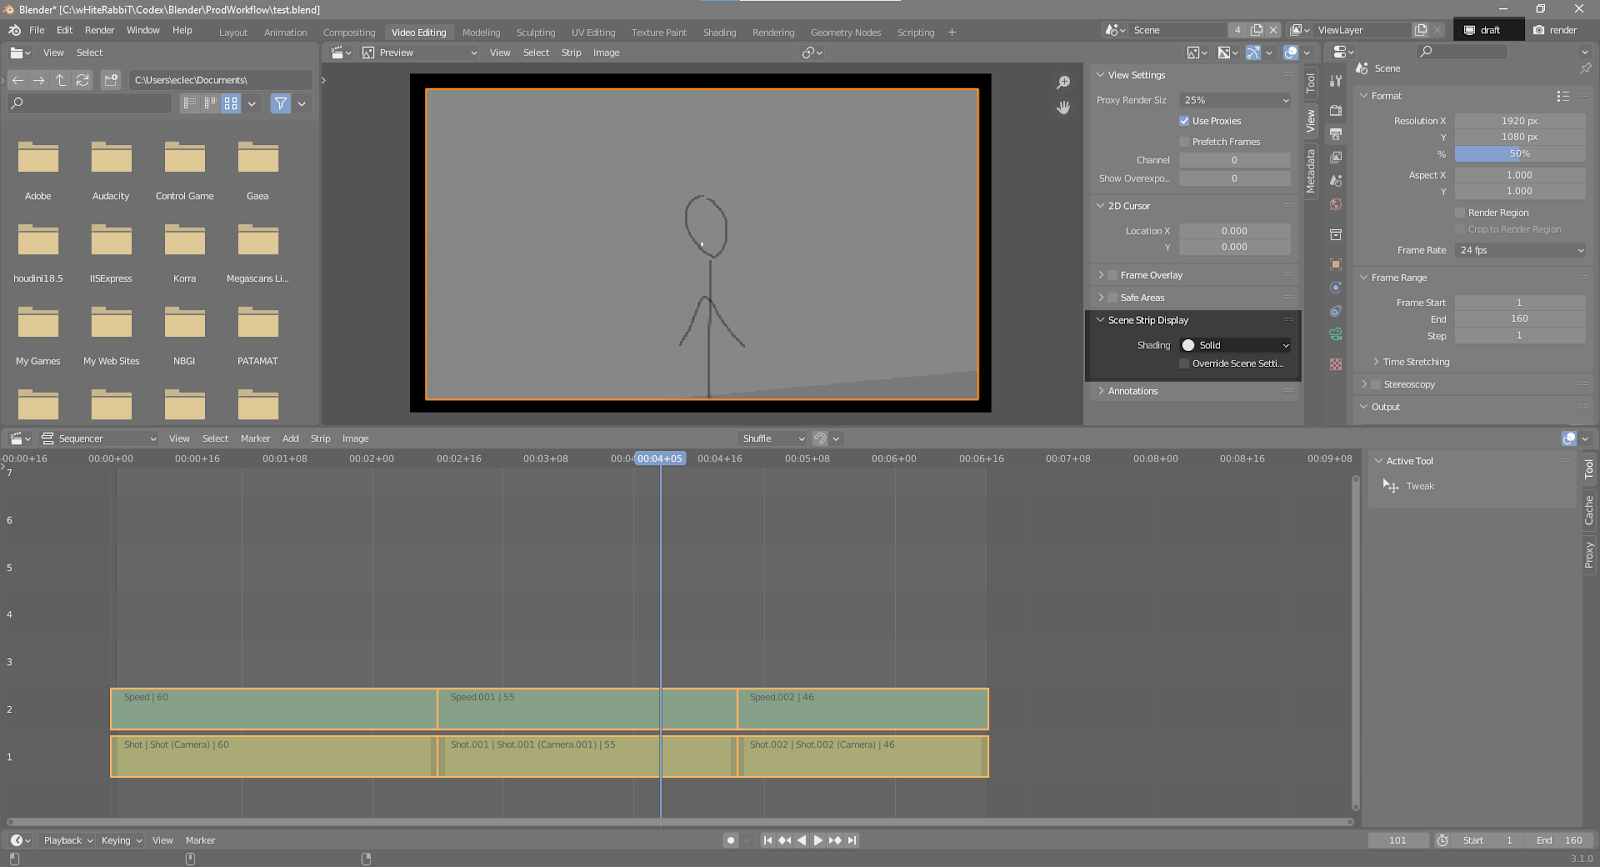
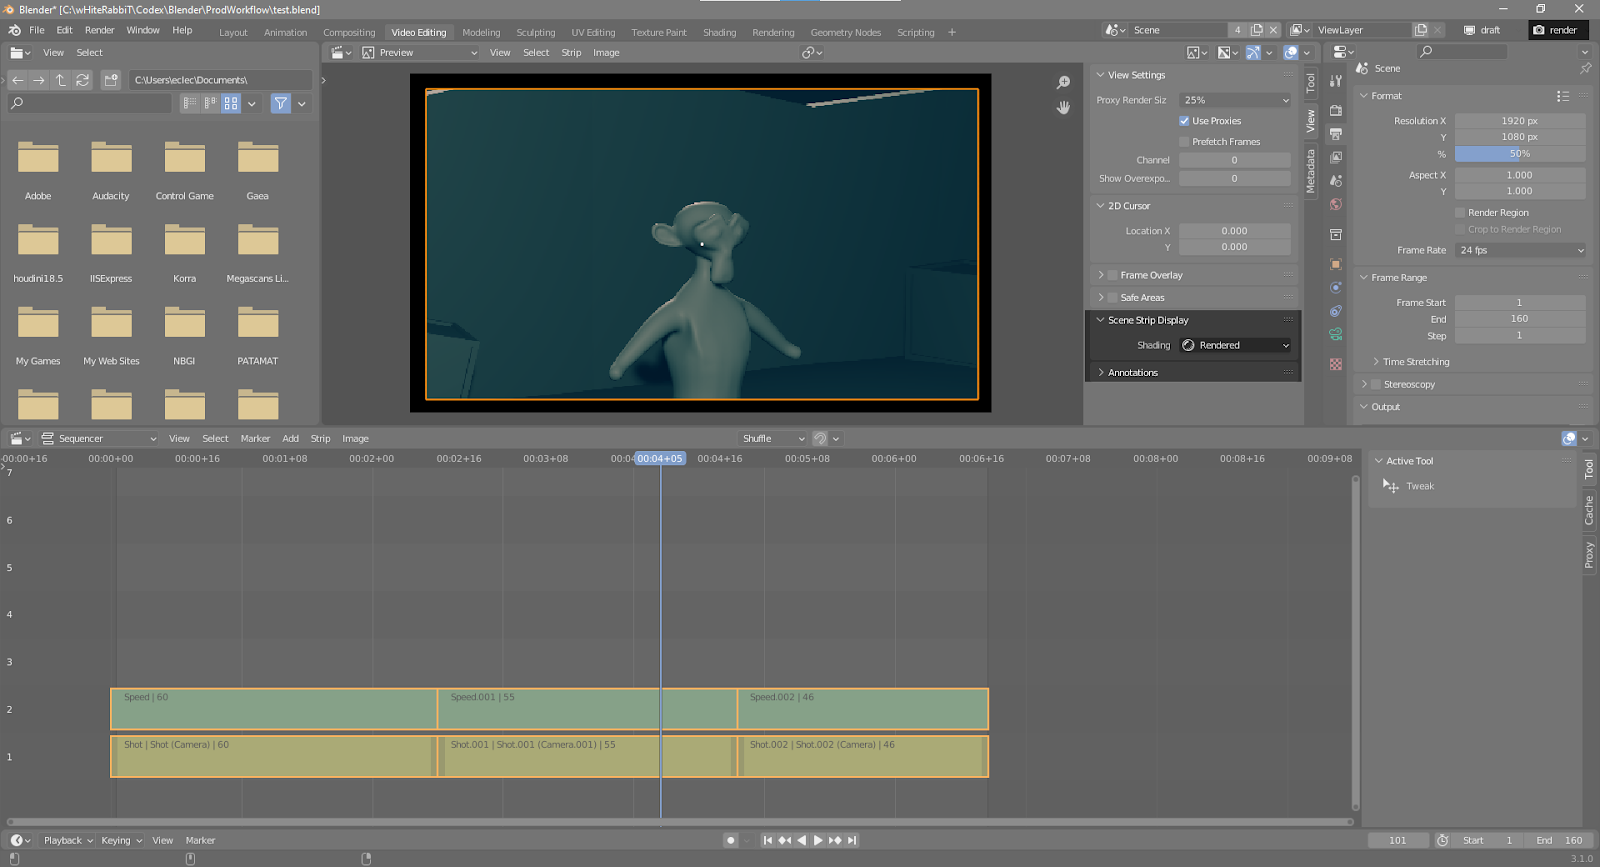
VSE ⤒
These filters will work from any workspace and in the case of the VSE, depending on the “Scene Strip Display > Shading” setting, will use viewport3D or render setting.
- Wireframe, Solid, Material Preview will use viewport3D filter setting.
- Rendered will use the render filter setting.