Links


Summary
Description ⤒
PBR Bridge is a Blender addon which drastically simplifies the workflow between Blender and industry standard paradigm softwares: Quixel Mixer, Substance Painter & ArmorPaint.
The challenge was to keep a non destructive workflow between the softwares so you won't have to apply any unnecessary modifiers, and then can go back and forth to retouch your modeling, UVs, UDIMs, etc.
It was also fundamental to be able to easily iterate without wasting time on doing any repetitive tasks manually, like baking the material ID maps, joining meshes, exporting / importing the FBXs, setting up the PBR materials, editing the Image Shader Nodes, etc...
So behold! The whole process is fully automated for you by this addon and, at the end of the day, it basically sums up to two operations:
- “Edit with Mixer/Substance/ArmorPaint”
- “Sync Maps & Create Shaders”
Compatibility ⤒
This addon is compatible with (tested versions):
- Quixel Mixer: 2021.1.2 BETA
- Substance Painter (& Steam Edition): 2019.3.3, 2020.2.0, 2020.2.2, 7.2.3, 7.3.0, 7.4.0 (2022).
- ArmorPaint: v0.8 (2021-09-18) - be27753
This addon is not compatible with (tested versions):
- Substance Painter: 2017.x(not working), 2019.1.0(not working)
Quickstart ⤒
This quick start guide will help you to get up and running with the addon.

Setting Paths ⤒
The addon will tell you if anything is not set correctly.
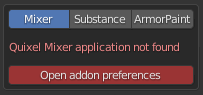
Quixel Mixer
Application
Set the correct path pointing to “Quixel Mixer.exe”
Projects
Provide your Mixer Files Path containing your Mixer’s projects when working with Mixer.
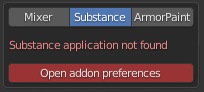
Substance Painter
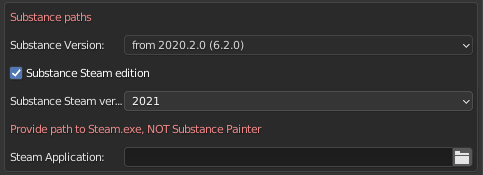
Substance Version
- From 2019.3.3: legacy support.
- From 2020.2.0 (6.2.0): required for UVTile workflow support.
- From 7.3: latest support
Substance Steam Edition
Enable this to support Substance coming from Steam.
Application
Path to “Adobe Substance 3D Painter.exe”
Substance Steam Version
When using Substance from Steam, you have to specify which version between 2019-2020-2021 should be launched.
Steam Application
When using Substance from Steam, if “Steam.exe” is not automatically found, you will have to provide its path manually.
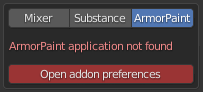
ArmorPaint
Application
Path to “Krom.exe” if you haven’t renamed it.
Miscellaneous ⤒
When clicking on “Edit with [Software]”, the addon will create a new folder structure next to the BlendFile.
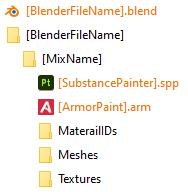
Depending on the software chosen, the addon will use them to export or save the required files:
- [MixName]: [SubstancePainter].spp & [ArmorPaint].arm.
- MaterialIDs: baked material ID maps for Substance & ArmorPaint.
- Meshes: FBX & OBJ for respectively Substance & ArmorPaint.
- Textures: exported maps from Mixer, Substance & ArmorPaint
Workflow basics ⤒
This addon is here to simplify the iterative workflow between Blender and Quixel Mixer / Substance Painter / ArmorPaint.
Since this is a non destructive workflow, you won't have to apply any modifiers, which becomes very handy when working with multiresolution modifiers.
Its purpose is to save time and reduce any errors that could happen from a manual process.
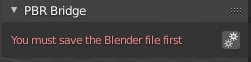
To be working, the scene from Blender has to be saved, since its filepath will be required for various operations.
Here are the main steps of the workflow:
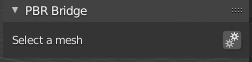
- Select a mesh
- Input a Mix name
- Click on “Edit with [Software]” (the mesh has to have valid UVs)
- Work on your mix within the chosen software as usual
- Export the textures to disk from that software (then close it)
- Click on “Sync Maps & Create Shaders”
- Tweak any necessary values (material & displacement properties)
- Iterate as necessary!
Detailed workflow ⤒
From Blender ⤒
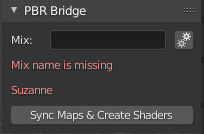
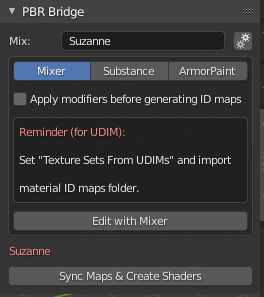
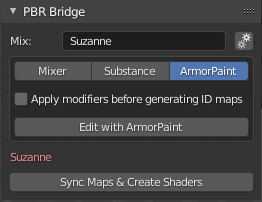
After selecting a mesh, the UI will change as follow:
You will need to input a Mix name.
Clicking on “Edit with [Software]” will:
- Create/open the correct project named after your blend file.
- When required, bake the material ID maps (with applied modifiers if the option is checked), many files will be generated if working with UDIM.
- Export all the meshes, part of the current Mix, as an FBX/OBJ, after applying each modifier and joining every meshes into a unique one, then link that FBX/OBJ to the project.
- Open the chosen application
Note that the material IDs colors will be auto generated so you don’t need to set them manually. Due to some color detection threshold, you will be able to configure up to 60 different material IDs.
Working with separated Meshes ⤒
It is not necessary to join every mesh that you want to be part of the same Mix.
You can leave them as separated object meshes, just give them the same Mix name.
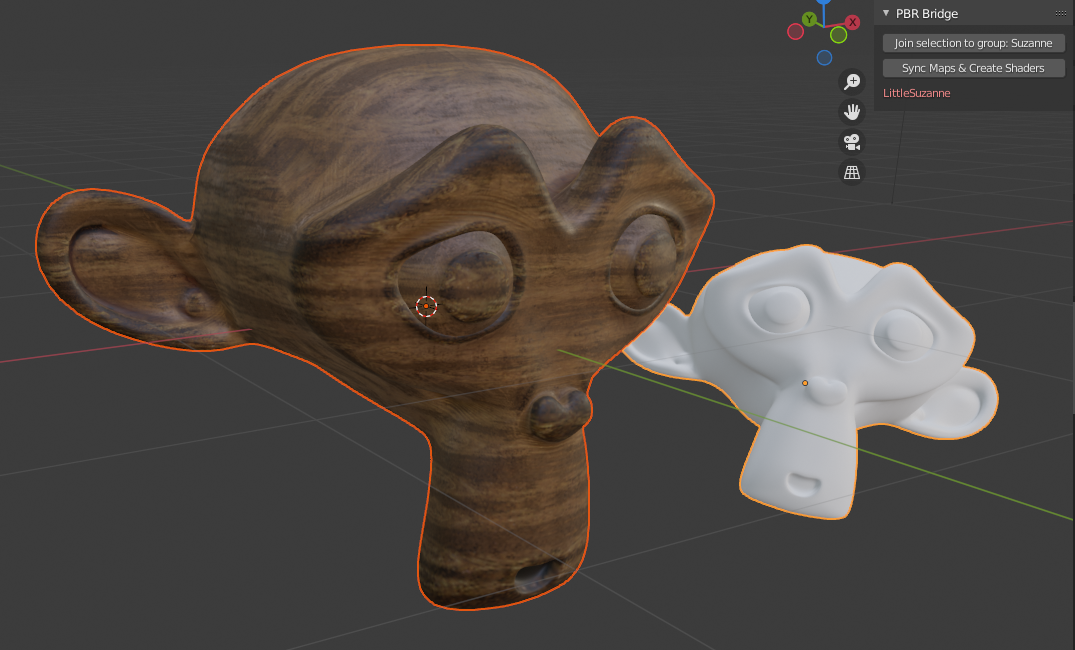
You can easily assign the same Mix name to several objects at the same time.
For that, select all the objects that you want to be part of the same Mix, then a new button will appear proposing you to “join (the) selection to group: [Mix name]”.
In case your selection contains multiple objects with different Mix names, you can choose under which Mix name you want to regroup by making “active” (last selected) the object which contains the Mix name you’re aiming for..
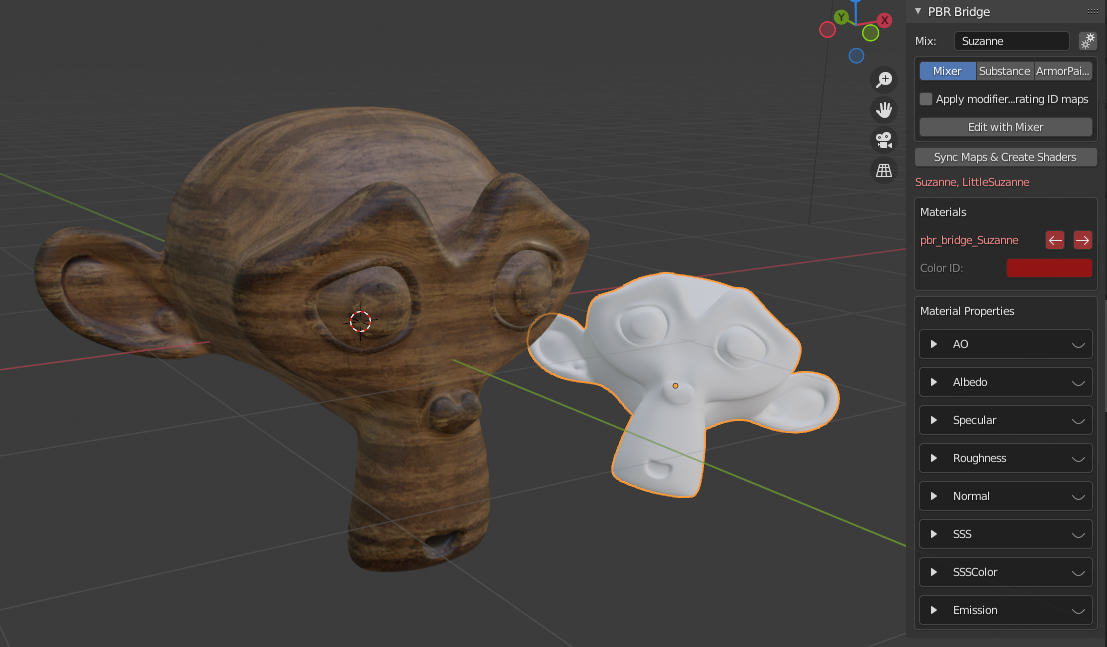
If all of the selected objects have the same Mix name, you can edit it at once. That will rename all the Mix names for each selected object.
Multiple UVMaps ⤒
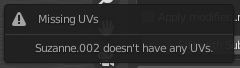
If a mesh part of a Mix doesn’t possess any UVMap, you’ll receive an error message saying which mesh is missing the UVs.
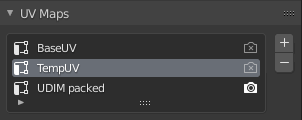
You can have multiple UVMaps on the same mesh, the one which will be joined and exported is the one for which “Active Render” is True.
In the example below, “UDIM packed” will be the one exported (it doesn’t have to be the “Active” one, which in that example is “TempUV”).
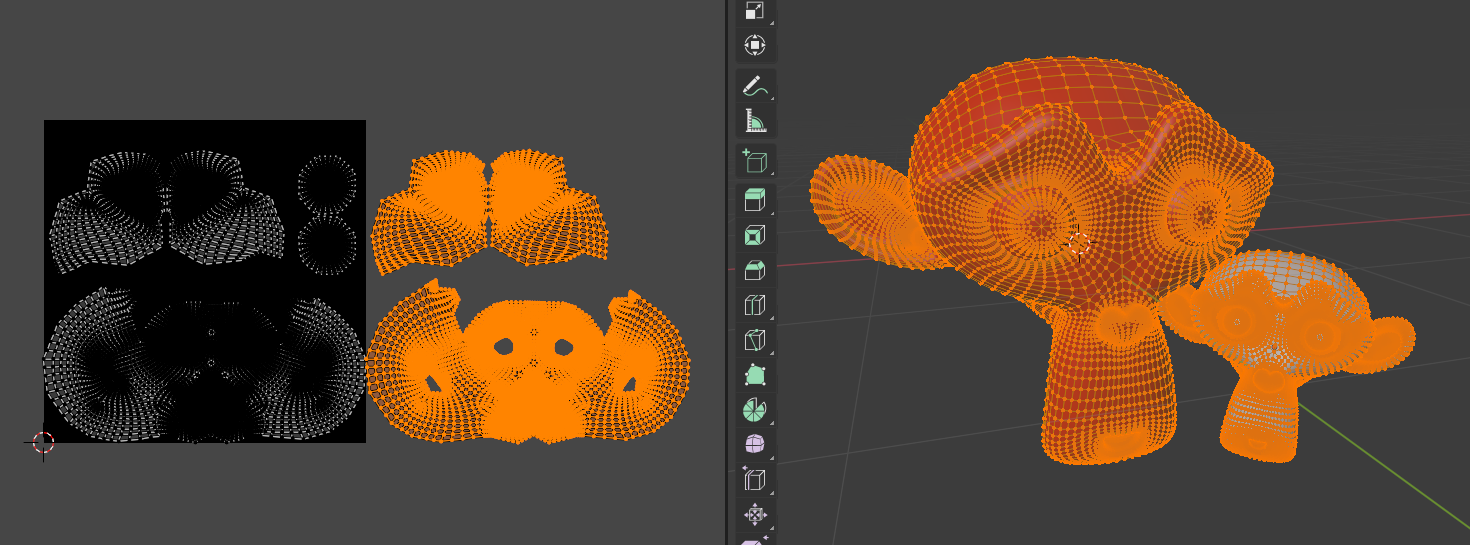
When working with multimeshes, just be sure you don’t have any overlapping UVs between the different meshes (or make sure that is actually what you want).
You can easily check this by selecting all the meshes, then switch to edit mode, select all the faces and look at their UVs as usual.
To Mixer ⤒
Clicking on “Edit with Mixer” will:
- Create a new Mixer project named after your blend file (if it doesn’t exist yet) in the Mixer project path location
- Create a new Mix inside this project, named after the name input field (if it doesn’t exist)
- Bake the material ID maps (with applied modifiers if the option is checked), many files will be generated if working with UDIM.
- Export all the meshes, part of the current Mix, as an FBX, after applying each modifier and joining every meshes into a unique one, then link that FBX to the Mix.
- Open Mixer application
Exported material ID maps & FBX can be found at
“[MixerProjects] \ [BlendFilename] \ [MixName] \ Custom Sources”
Within Mixer ⤒
Unfortunately, there is currently NO command line or API for Quixel Mixer application, so there is no way to directly open a Project / Mix.
So, one has to select it manually and then click open.
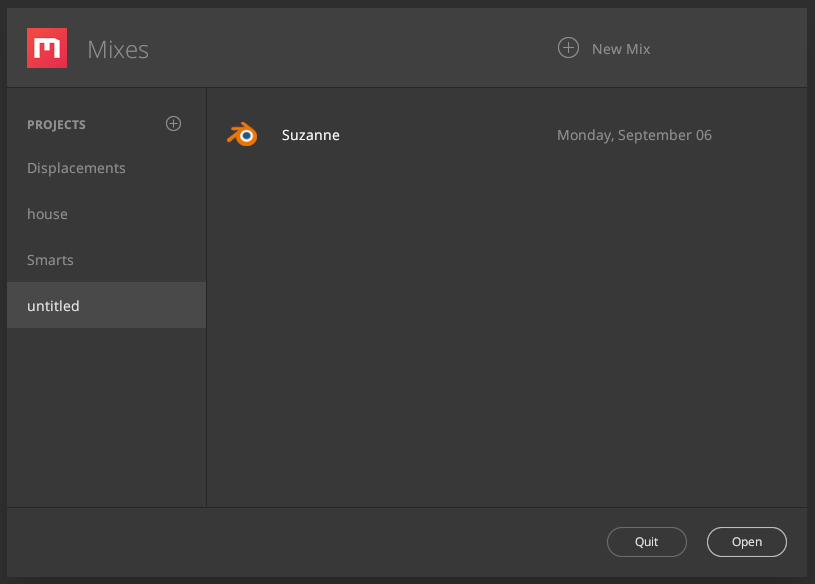
The addon will have created an easy project to find since its name will be the same as the working Blender file.
The new Mix to open will have a Blender icon and your Mix name previously entered. That icon will be updated to a regular preview once the Mix is saved from Mixer.

By default, the addon will create a Mix with this settings:
- 1024px
- Texture Preset: Metalness Map
- Export Location: “[Current Blender filepath] \ [BlendFilename] \ [MixName] \ Textures \”
- Texture Sets: Single
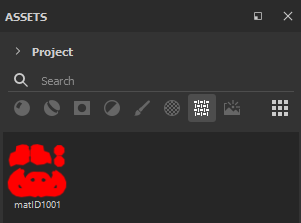
- Texture Set 1 / Material ID: materialID.1001.png
Apart from the export location, changing these settings is up to the user and won’t interfere in any way during the next steps.
Work as usual with your Mix and export the maps via “Export to Disk” or “Quick Export” and close the Mixer application.
Working with UDIM ⤒
To work with UDIM, you only have to offset the UVs to a desired UDIM Tile.
Once you’re happy with your new UVs, click on “Edit with Mixer” as usual.
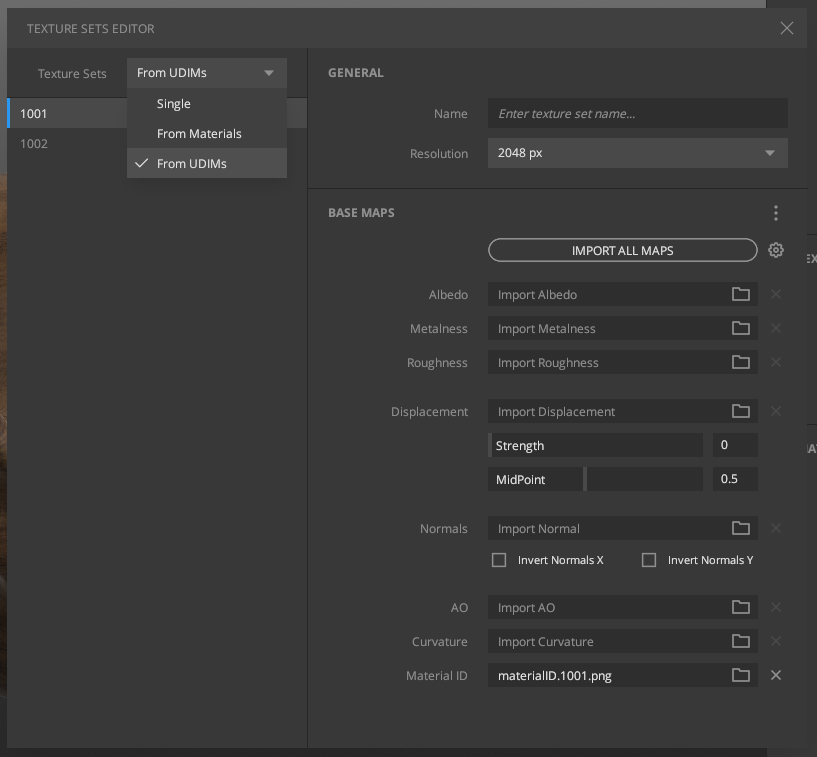
With your Mix open, you will have to manually edit the Textures Sets in Mixer.
After selecting the “Texture Sets From UDIMs” option, Mixer will find your different UDIM tiles.
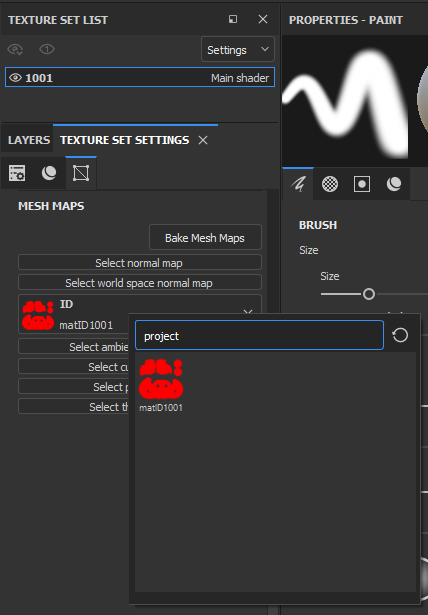
You will have to manually assign the “Material ID” maps.
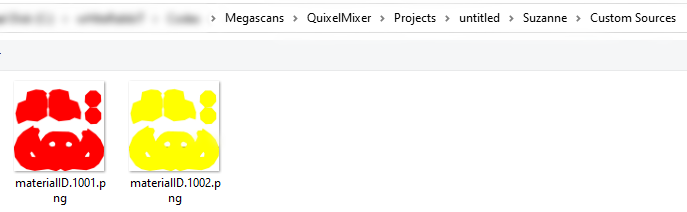
Easiest way being to select all the Texture Sets, then click on “Import all maps”, and choose the folder containing all the “material ID” maps, which you can find in your Mixer project subdirectory, namely:
“[QuixelMixer ProjectDir] \ [BlendFilename] \ [MixName] \ Custom Sources”
To Substance Painter ⤒
Clicking on “Edit with Substance” will:
- When using Legacy, bake the material ID maps (with applied modifiers if the option is checked), many files will be generated if working with UDIM.
- Export all the meshes, part of the current Mix, as an FBX, after applying each modifier and joining every meshes into a unique one, then link that FBX to the project.
- Open Substance Painter application
- Create & save a new Substance project named after your Mix name (if it doesn’t exist yet).
- Set Substance UDIM project Workflow according to the “Use UDIM Legacy” checkbox (choice only present for 2020.2.0 and upper version).
- Set the export textures url to the texture folder (under [MixName] folder).
- Import & set correct export preset to work with the synchronisation process.
- Set the export padding:'Transparent' & dilation:2 for projects using UVTile workflow
Exported material ID maps & FBX can be found in the generated folders next to the blend file at “[BlendFilename] \ [MixName]”
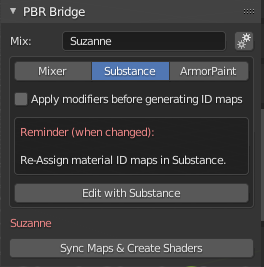
UI when selected version is from 2019.3.3.

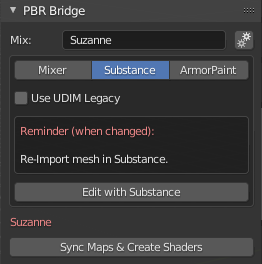
UI when selected version is 2020.2.0 (6.2.0).
Within Substance Painter ⤒
When using UDIM Legacy workflow
The addon will import / update your material ID maps but oddly, you will have to set / reassign them to the TextureSets manually even when the maps are correctly updated in the project.
When using UVTile workflow
Unfortunately, at the time of writing, there is no way either from command line nor via coding a plugin, to re-import the mesh without losing the UVTile setting.
So one has to re-import it manually when necessary.
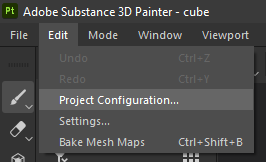
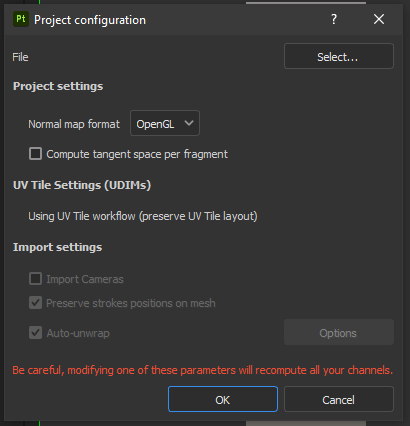
The re-importing can be easily done via “Edit > Project Configuration... > Select...”.
Texture export
To export your textures, since the Output template has already been imported and set, and that the output directory is already set to the right folder, you just need to click on “Export”.

To ArmorPaint ⤒
Clicking on “Edit with ArmorPaint” will:
- Open the ArmorPaint project named after your Mix name, or import the OBJ into a new project (you will have to save that project manually and choose its correct location in order to be found by the addon)
- Bake the material ID maps (with applied modifiers if the option is checked), many files will be generated if working with UDIM.
- Export all the meshes, part of the current Mix, as an OBJ, after applying each modifier and joining every meshes into a unique one, then link that OBJ to the project.
- Copy the “WR PBR Bridge Blender” export presets.
- Open ArmorPaint application
Exported material ID maps & OBJ can be found in the generated folders next to the blend file at “[BlendFilename] \ [MixName]”
Within ArmorPaint ⤒
Important!
The first time you’re opening a new mix with ArmorPaint, you will have to save that project manually. To make it work correctly with the addon you have to:
- Name the file [MixName].arm
- Save it at “[Current Blender filepath] \ [BlendFilename] \ [MixName] \”
For example, if:
- your Blender file is named “MyScene.blend”
- its filepath is “C:\ Users \ You \ BlenderProject \ MyScene.blend”
- you’ve named your mix “sPaceshiP”
Then you shall save your file at:
- “C:\ Users \ You \ BlenderProject \ MyScene \ sPaceshiP \ sPaceshiP.arm”
Important! Bis
Since the mesh is actually saved into the arm file, make sure you hit reimport (Ctrl+R) each time you’re opening your project.
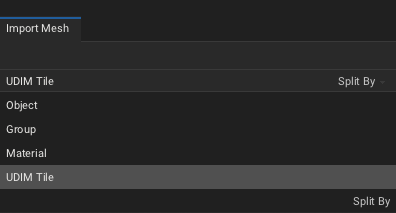
By default, the OBJ Mesh is split by object, if you want to work with UDIM, simply re import the mesh (Ctrl+R) and choose to split by UDIMs
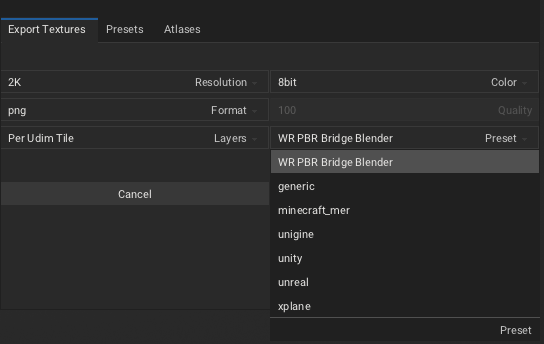
To export your textures, simply choose the “WR PBR Bridge Blender” output template. The output directory is already set to the right folder.
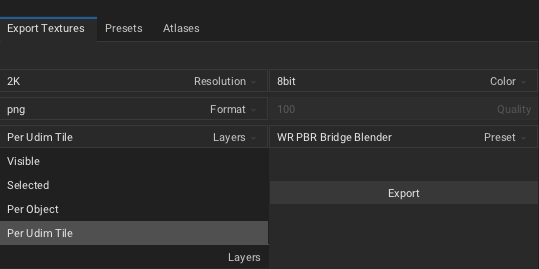
If you’re working with UDIM, select “Per Udim Tile” in the Layers dropdown.
Then choose the right export location which has to be:
- “[Current Blender filepath] \ [BlendFilename] \ [MixName] \ Textures \”
- (Given the previous example that would be ““C:\ Users \ You \ BlenderProject \ MyScene \ sPaceshiP \ Textures \”)
And back again! ⤒
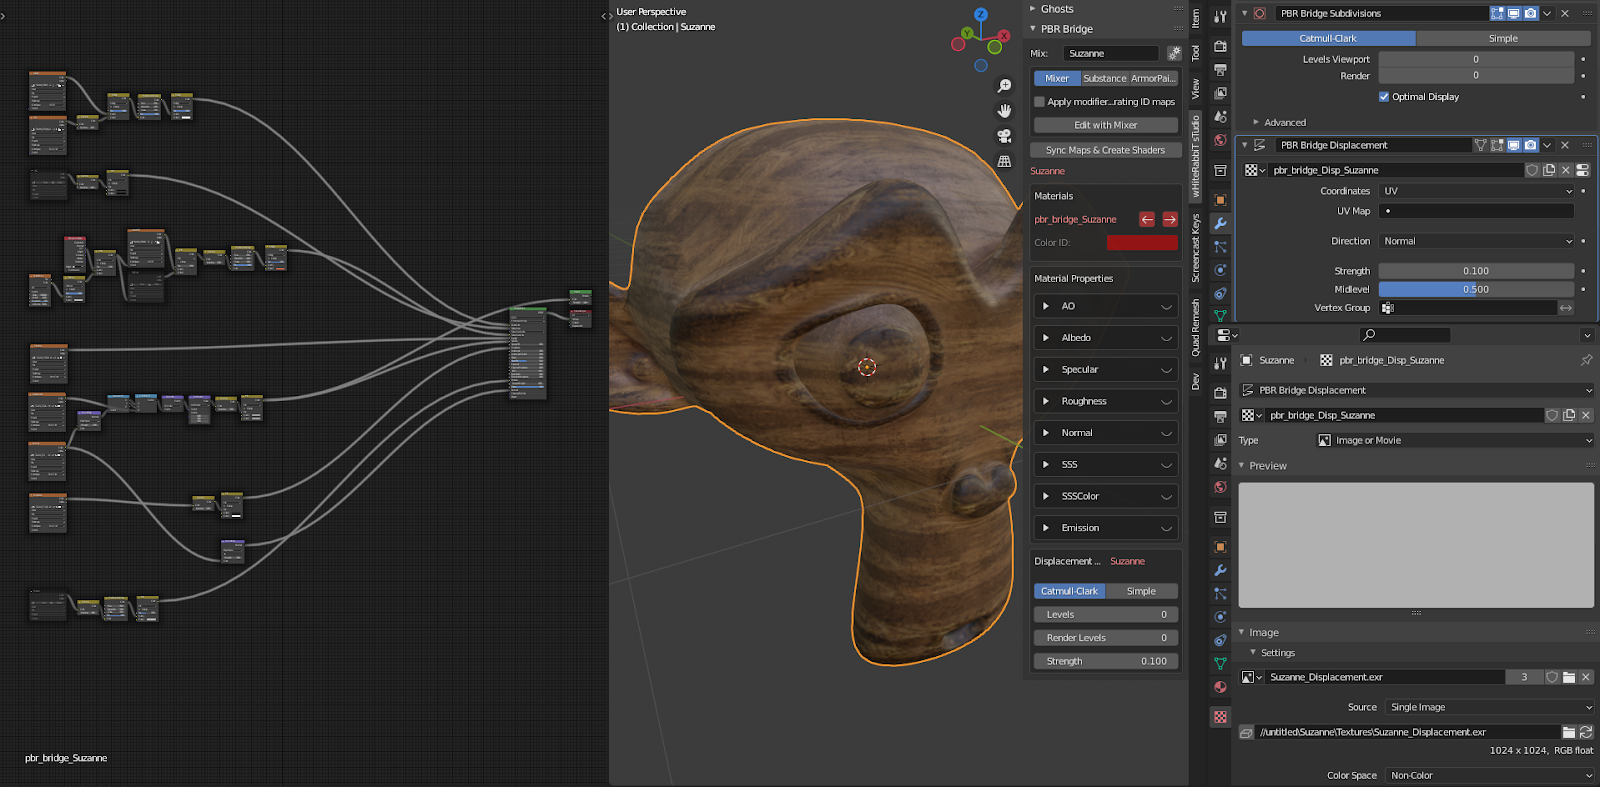
Sync Maps & Create Shaders ⤒
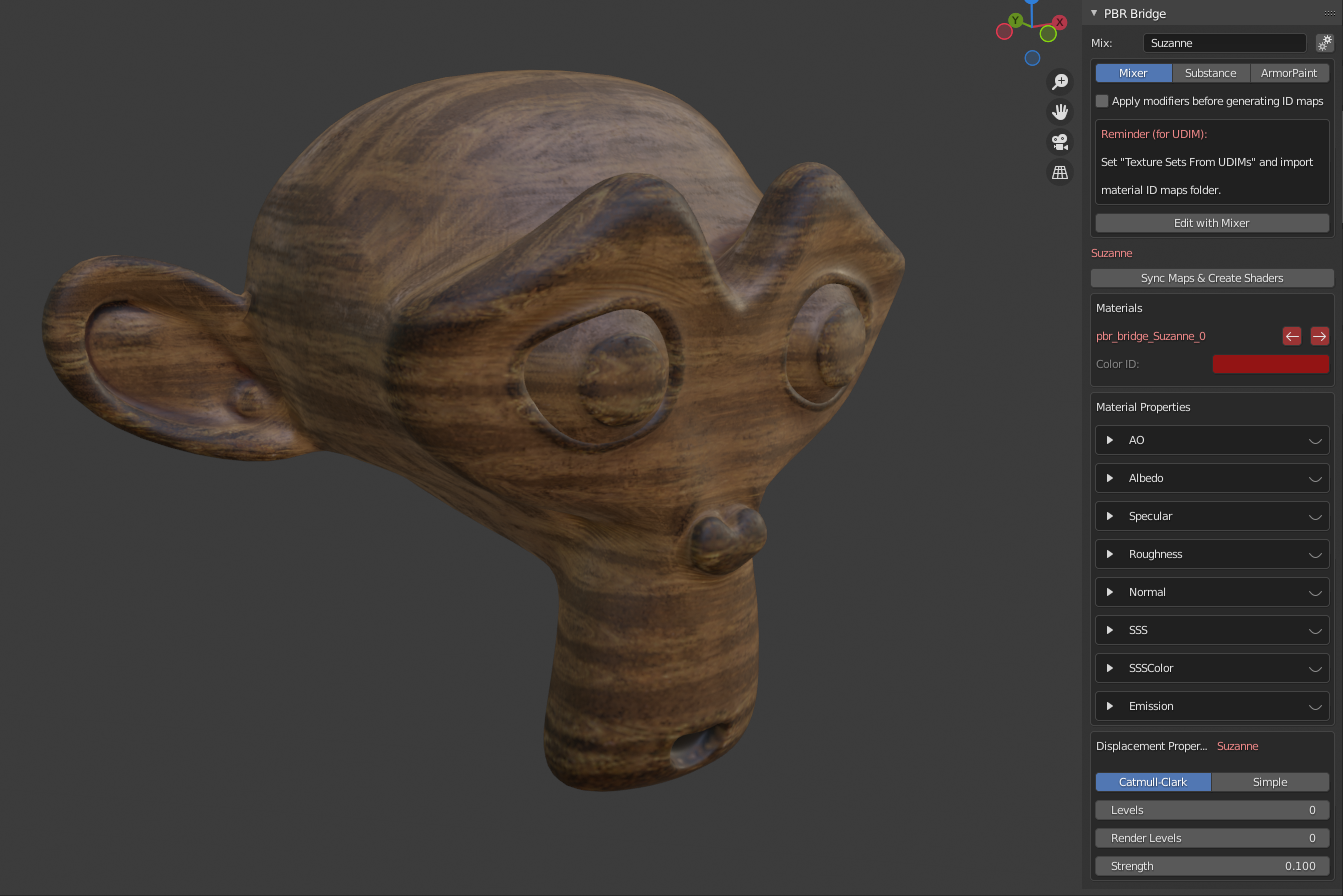
The “Sync Maps & Create Shaders” functionality will:
- Create a Shader named “pbr_bridge_[MeshName]” (if any material is already assigned)
- Populate the shader with the new generated maps
- Create a new texture named “pbr_bridge_Disp_[MixName]”
- Assign the exported displacement map to that texture
- Add a “Subdivision Surface” modifier (with viewport & render level set to 0) to the meshes (if not already present)
- Add a “Displacement” modifier to the meshes, using the new “pbr_bridge_Disp_[MixName]” texture (if not already present)
You don’t actually have to export all the maps and can choose which ones are relevant to your situation. The addon will mute the Shader Nodes for which the maps are missing.
You can even click on “Sync Maps & Create Shaders” just to create the material and don’t need any maps to be exported at all.
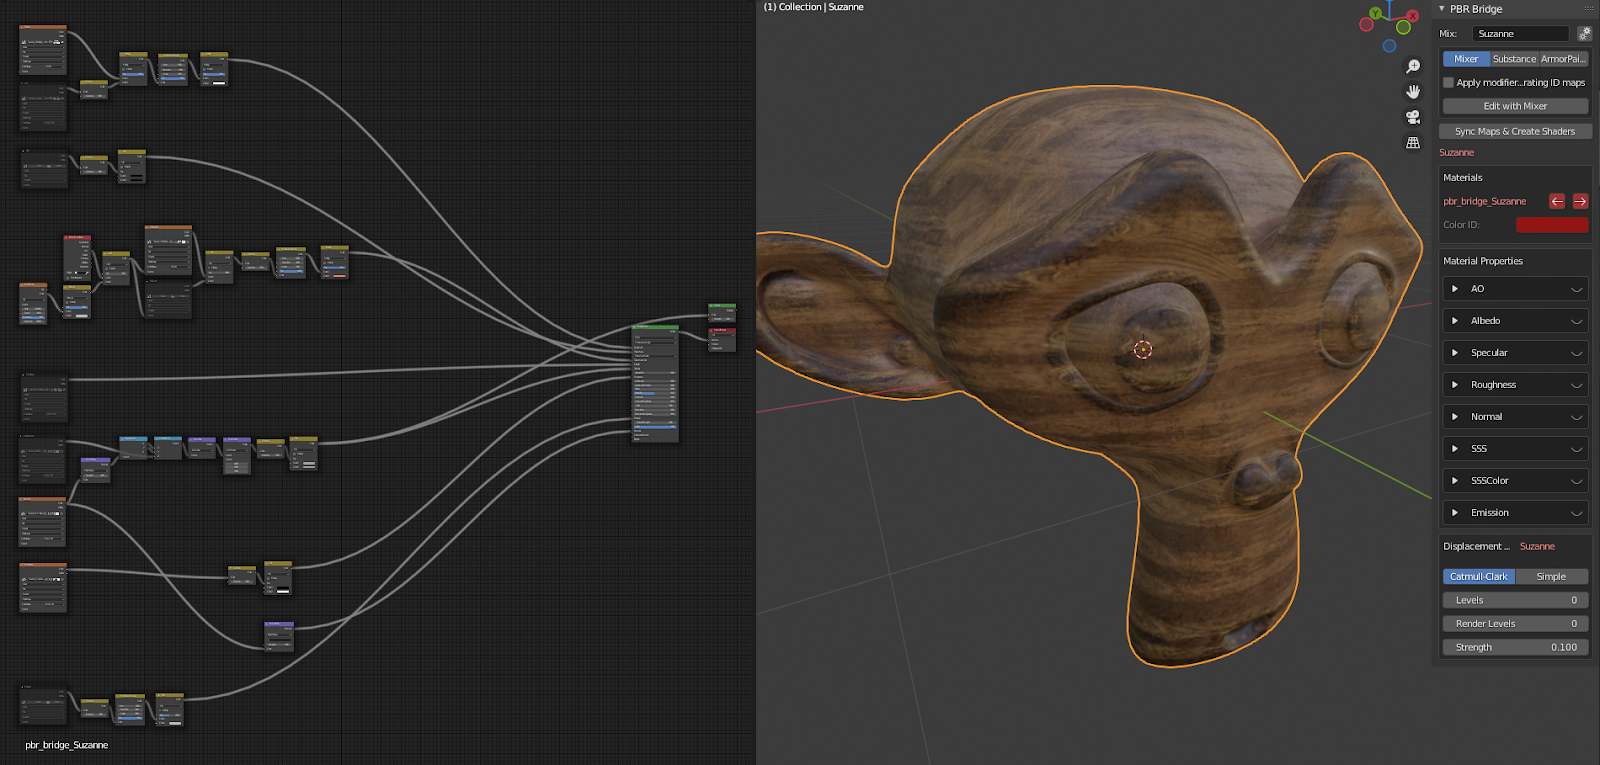
Tweak Material & Displacement properties ⤒
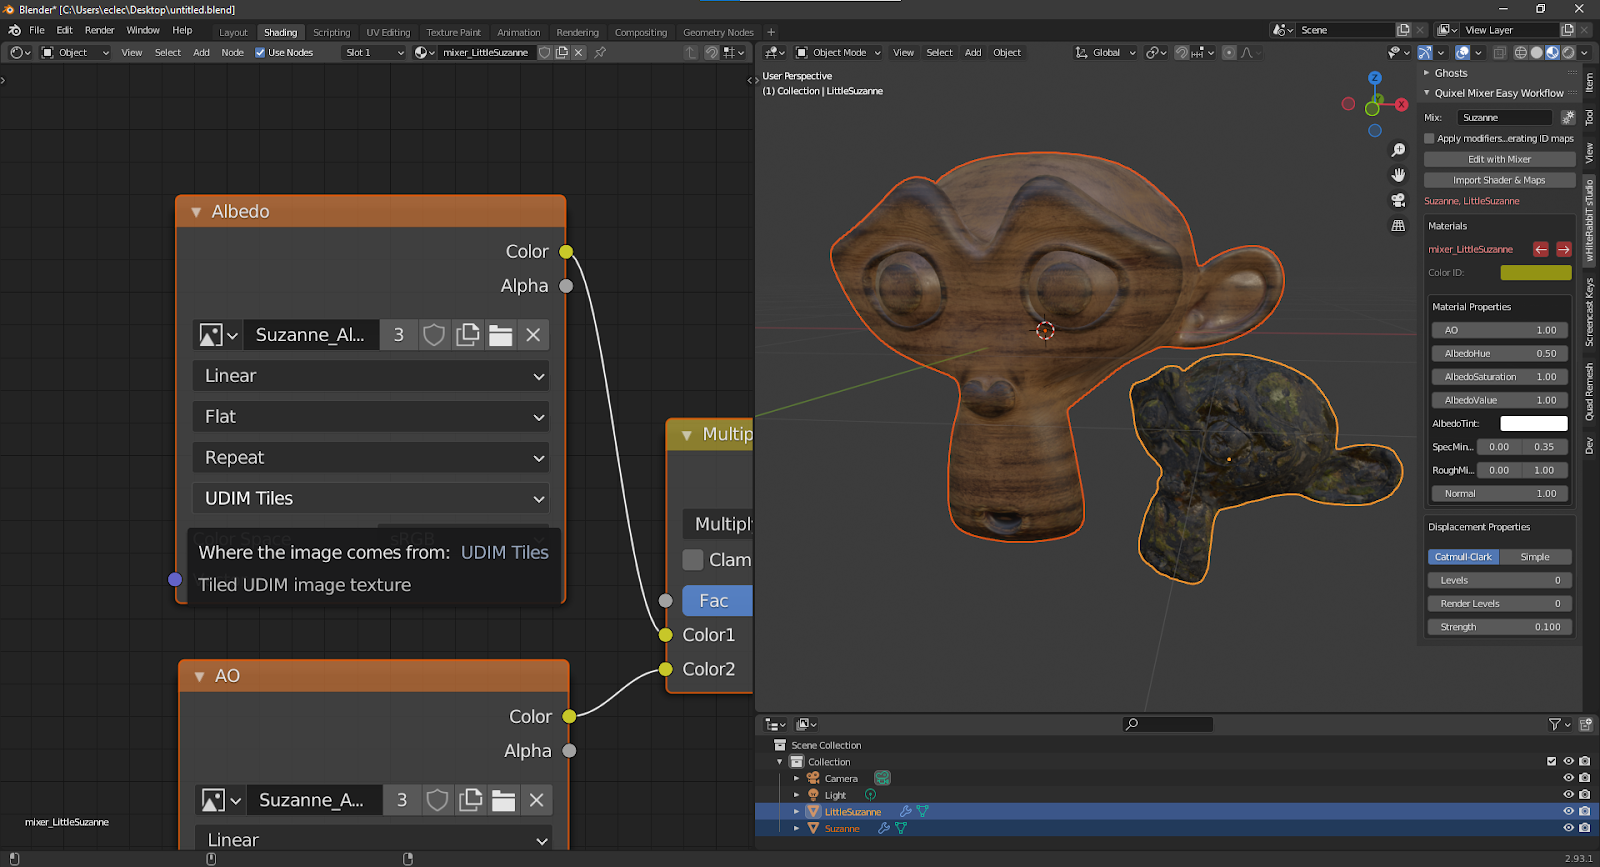
The addon will look for particular nodes inside the Shader to detect if it is compatible and if so will show that new UI:
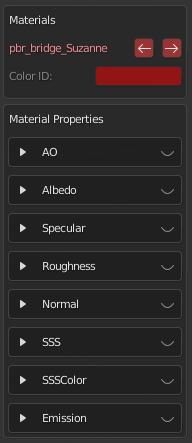
This UI exists so you won’t have to dig into the Shader Node view to change any value like:
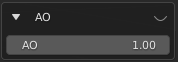
- Ambient Occlusion (Albedo multiplication factor)
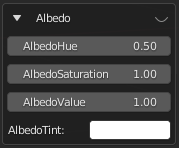
- Albedo Hue/Saturation/Value
- Albedo Tint

- Min & Max Specularity
- Specularity Gamma Factor
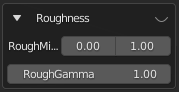
- Min & Max Roughness
- Roughness Gamma Factor
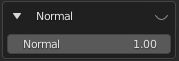
- Normal strength
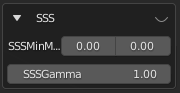
- Min & Max SSS
- SSS Gamma Factor
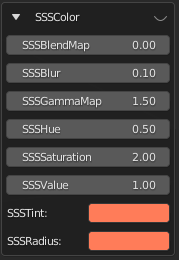
- Blend between Generated Subdermal & Imported Map
- Subdermal Blurriness
- Subdermal Gamma Factor
- Subdermal Hue/Saturation/Value
- Subdermal Tint
- SSS Radius
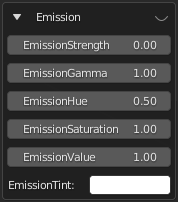
- Emission Strength
- Emission Gamma Factor
- Emission Hue/Saturation/Value
- Emission Tint
You can also directly preview any of them by clicking on the eye icon.

Additionally, the UI adds the possibility to directly tweak the mesh modifiers:
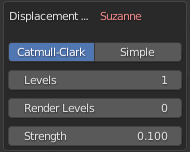
- Subdivision Type
- Subdivision Surface viewport level
- Subdivision Surface render level
- Displacement strength (Multiple when exported from Substance UVTile workflow)
Working with UDIM ⤒
When using UDIMs, the addon will import the image as UDIM Tiles, you won’t have to set anything manually.
Also, the Image Shader Nodes will be set to use UDIM as well.
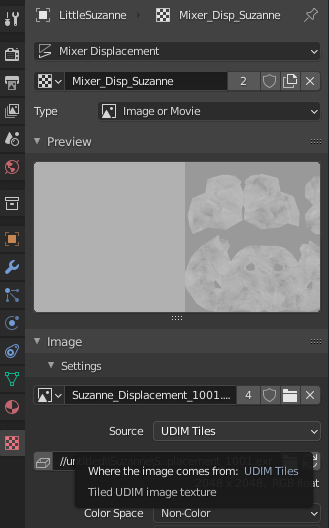
Which will also be the case for the Displacement modifier.
Iteration ⤒
Since this is a non destructive workflow, and you won't have to apply any modifiers, you can easily iterate the whole process as many time as desired, which basically sums up to two operations:
- Select a mesh
- “Edit with [software]”
- Work on your Mix
- Export the maps
- “Sync Maps & Create Shaders”, which will update everything while keeping your additional tweaks
- Repeat