CGMA - Introduction to FX with Houdini - Week 6 & 7
I wrote this article at CGMA’s request from the perspective of publishing it on 80.lv and CGSociety.
Intro
Could you introduce yourself to us? Where do you come from, what do you do, what projects have you worked on? What CGMA/CG Society course(s) did you take?
Hi everyone! My name is wHiteRabbiT and I am a Technical Artist / Sr. Unity Developer. I started my 3D journey with DirectX6 and 3D Studio Max, did a lot of programming, shaders, did my own 3D engine (a 128-bit Quadruple-precision floating-point 3D engine in C#/C++), also some Android games and, recently, I discovered Houdini.
Houdini is a reunion of what I always liked, from modeling to programing, and what I always wanted to achieve, for realtime purposes to deep baked simulations.
As I was willing to have a good overview of its capabilities and learn fast, I took the CGMA course entitled “Introduction to FX with Houdini”.
What systems have you been experimenting with for VFX? What makes the tools you are using interesting to you in practical terms?
I experimented various simulations (such as destruction, clothes, ...) in 3ds Max or Blender, played a little with After Effect but to this day, none of them has this straight forward capacity of doing it so easily, and above all, in a non destructive way.
Houdini can stay fully procedural and always offers the possibility to tweak any value from the start to the end of the setup, at any time during the production.
Which is, in addition to being very powerful, extremely handy to always keep an artistic control.
Assignment
Can you tell us about the main tasks that you had to do here?
This project was split in 2 different tasks.
The first week was focused on the fluid simulation and the white water (and foam) generation.
The second was about how to render it with Mantra, Houdini’s renderer.
Can you talk about the simulation technique here?
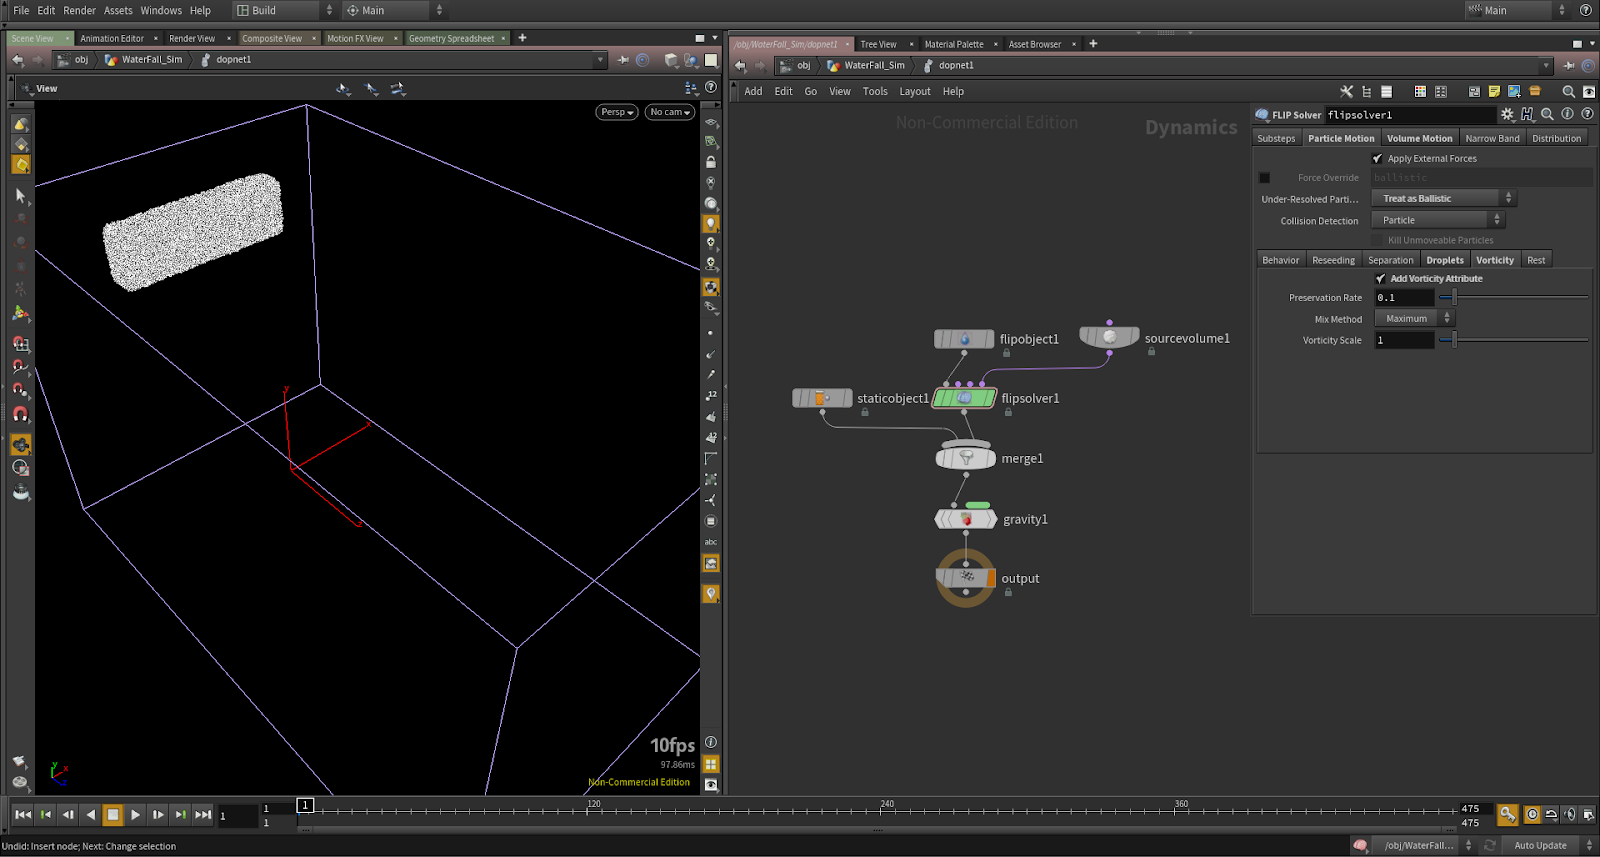
All is simulated under the DOP Network node, and the core of the simulation is the FLIP Solver node.
First of all, because this is a physics simulation, we have to make sure we are working with the right scale in our scene.
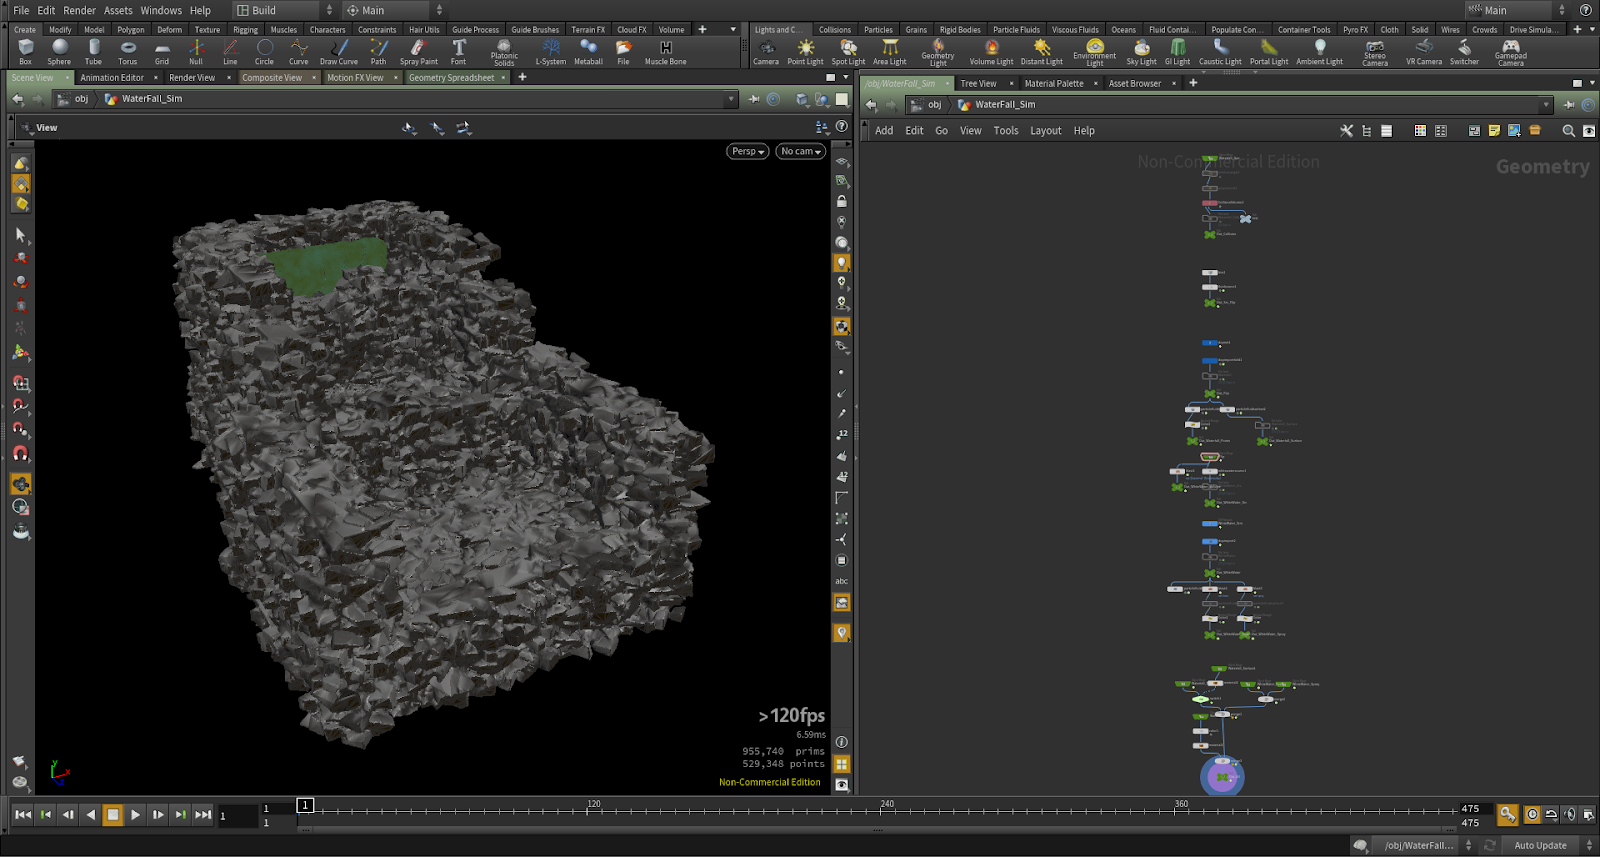
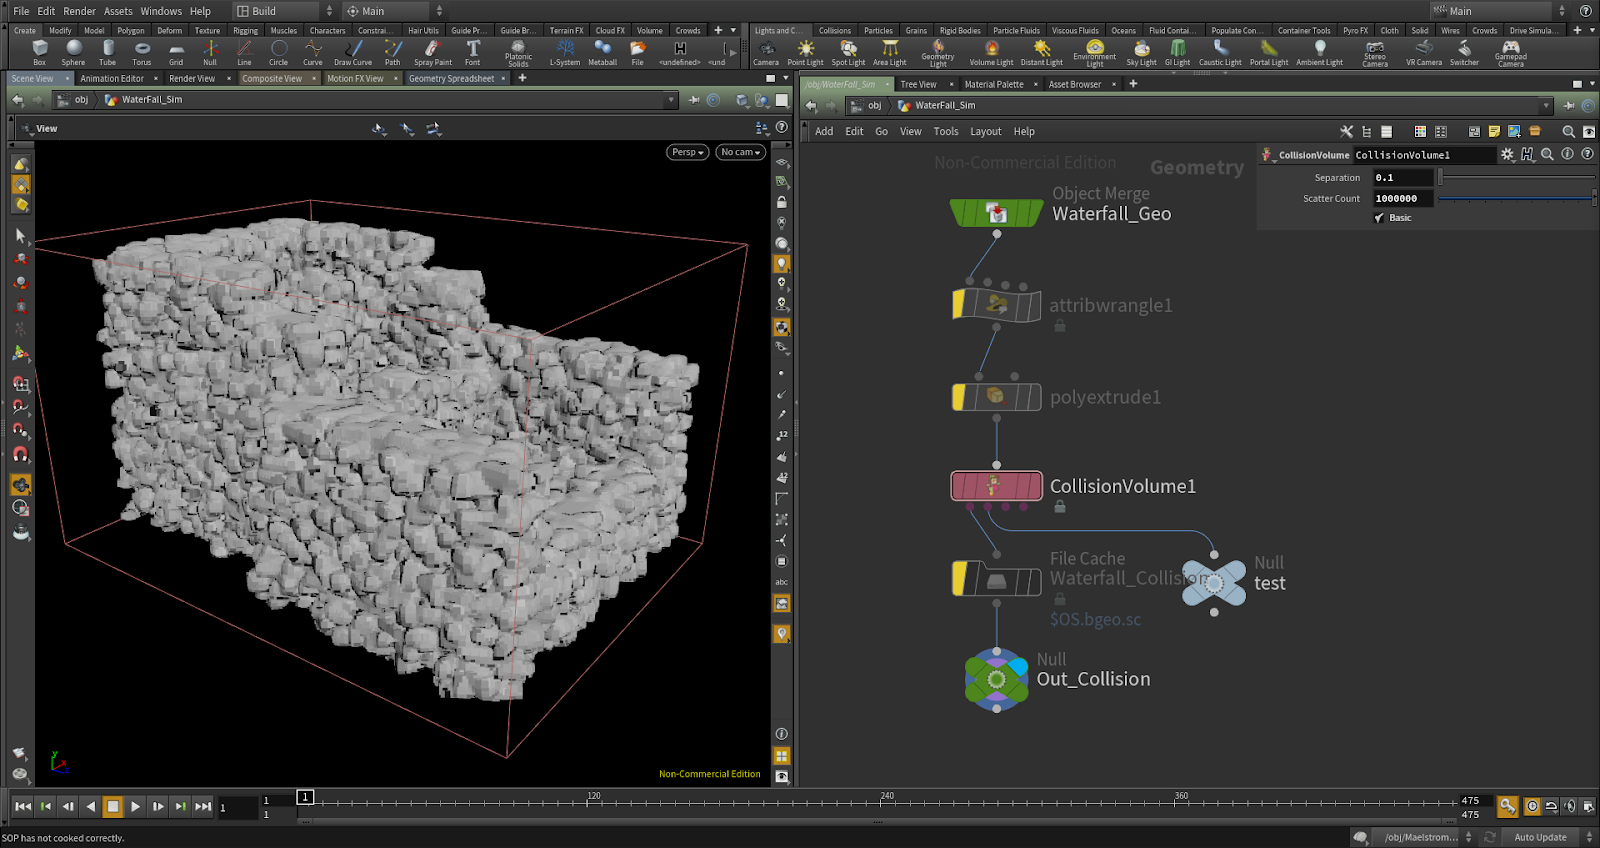
In my case, I didn’t want to make a huge waterfall because I knew that my computer wouldn’t take it. So I created some rocky cascade container around 6m long, which I converted to a Volume Collision in order to have a good collision interaction in the fluid simulation.
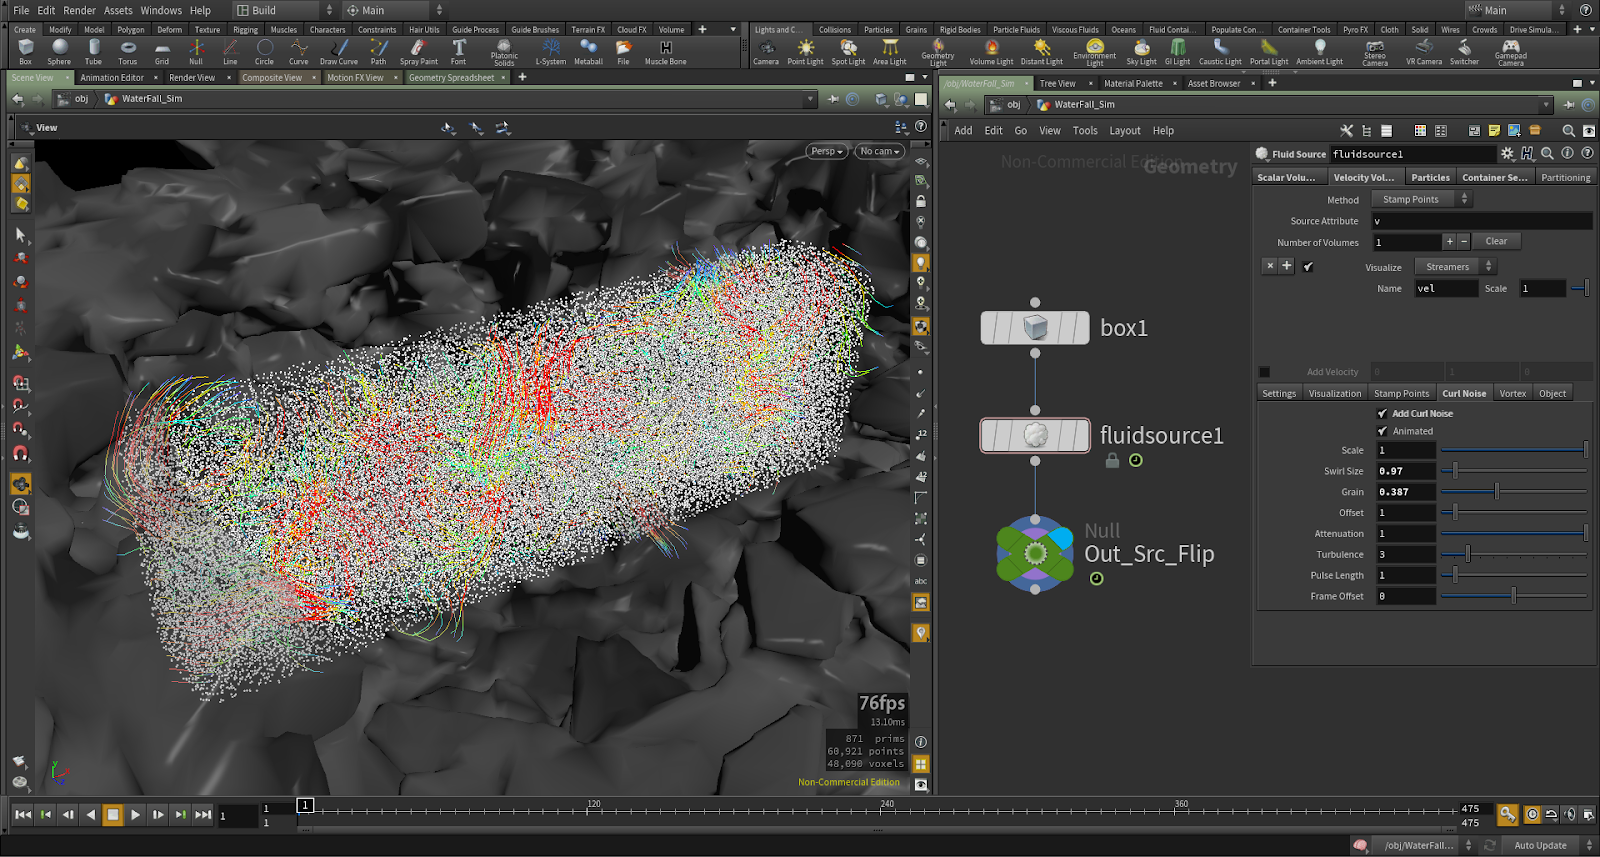
Then we have to create a Fluid Source which will be the domain where the fluid will be generated from.
It will simply try to keep this area always full. So for example, if there wasn’t any force at all (no gravity, wind, etc) this fluid would stay still during the whole simulation.
For a continuous flow, we have to create this area slightly above the height of the future water level.
Adding some noise to the velocity will add more realistic and less predictable fluid behavior.
At this step, everything is ready to be used in the FLIP simulation.
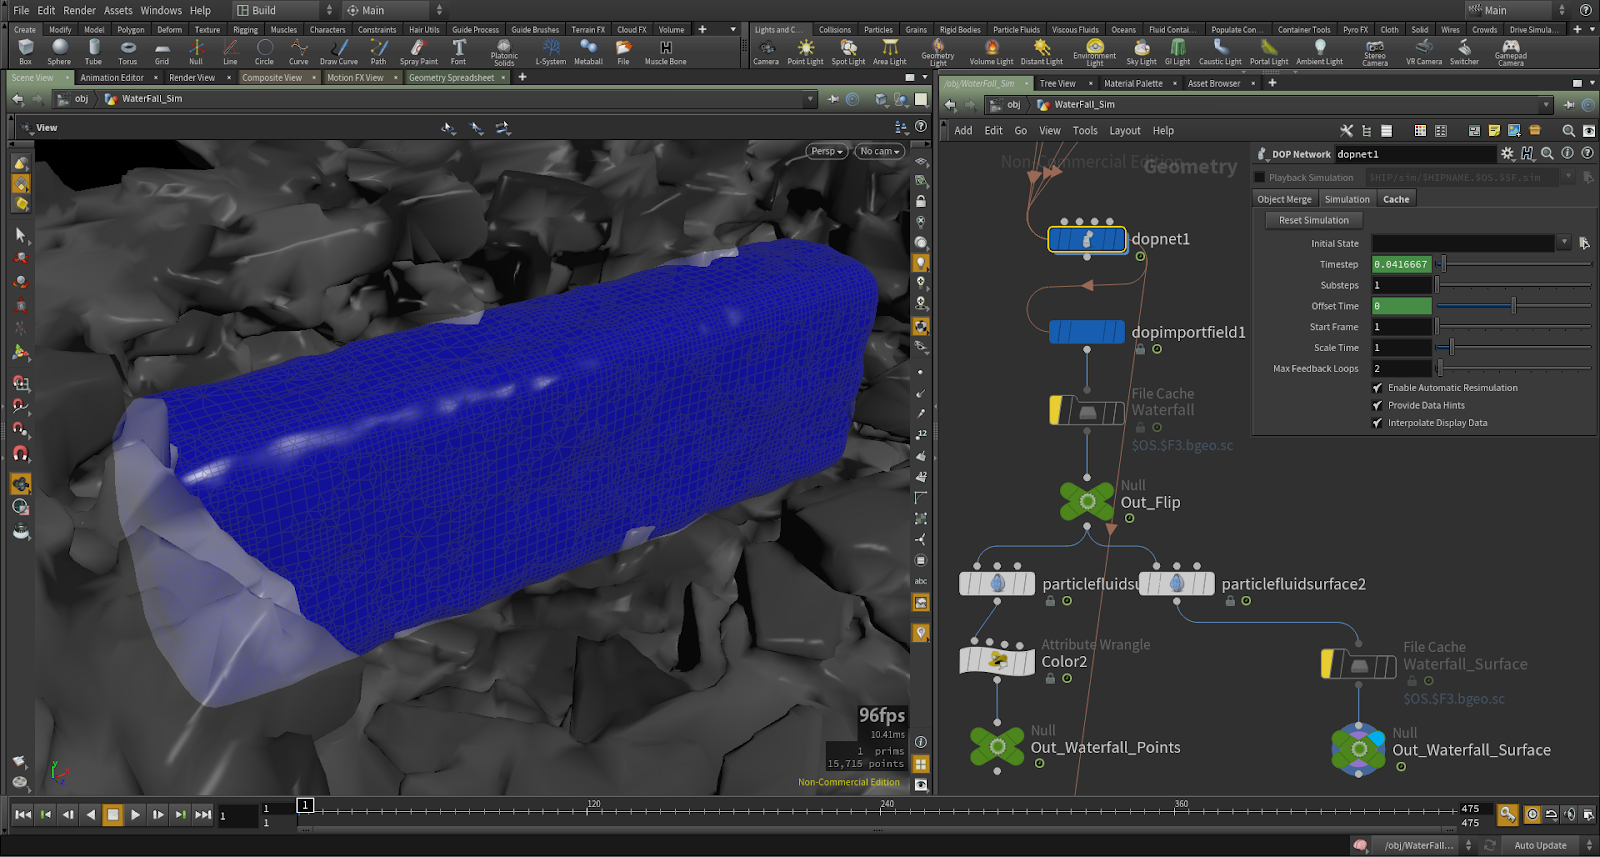
The simulation will happen inside a DOP Network, where we will reference our Fluid Source and Volume Collision.
Its result is then converted to a polygon surface, which will be our water rendered geometry.
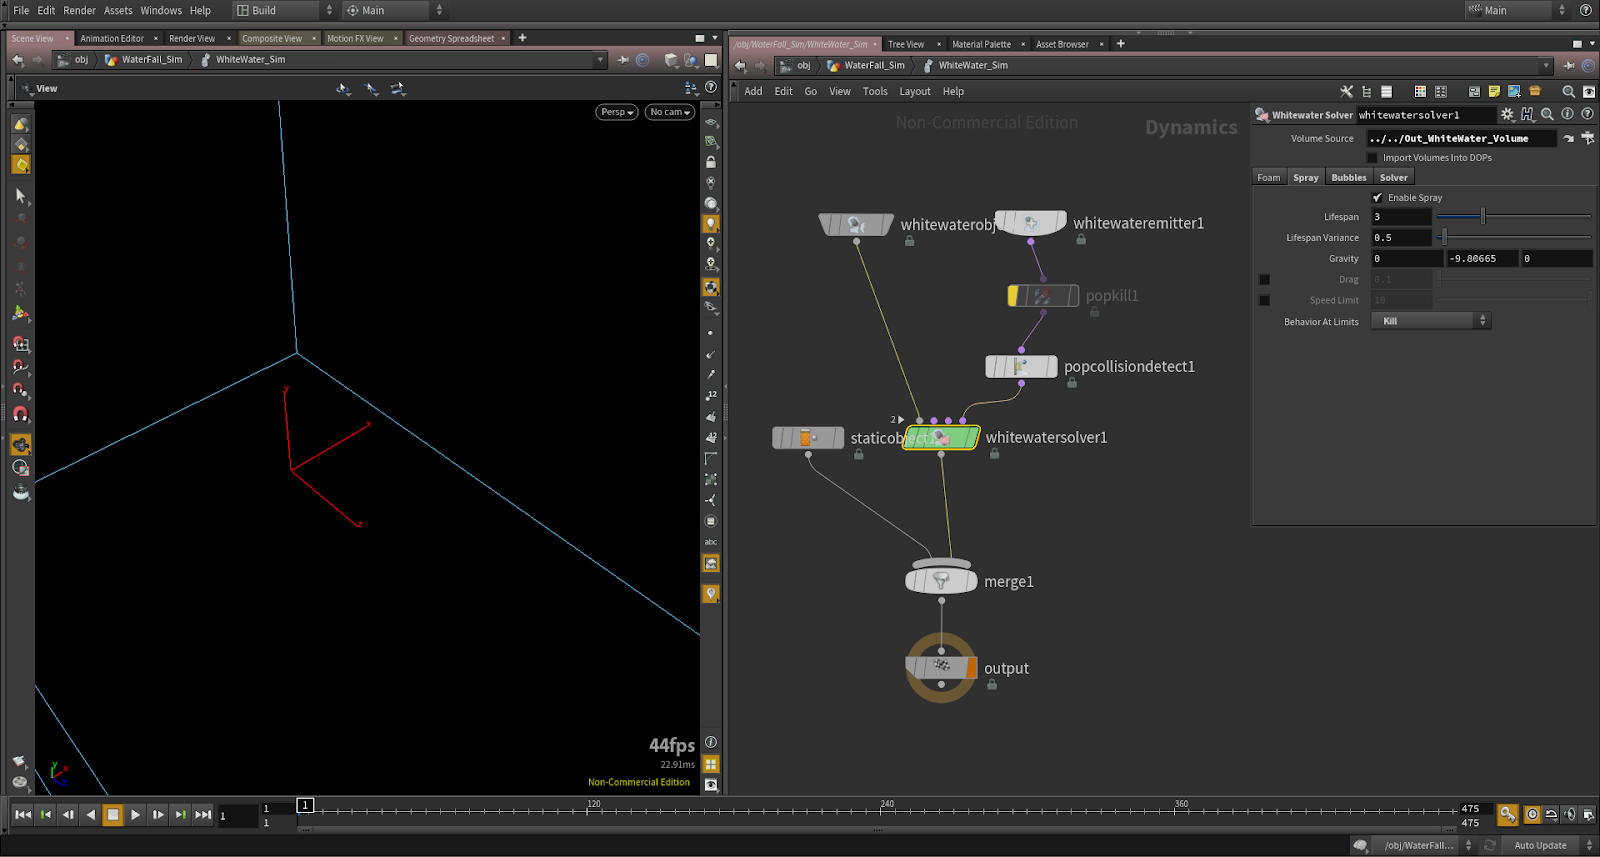
The white water and foam generation is quite straight forward from here. We just need to use a Whitewater Source node.
With this data, the velocity field and surface from the FLIP simulation, we can now simulate our white water inside a new DOP Network.
The output of this node will give us two groups of point: “foam” and “spray”.
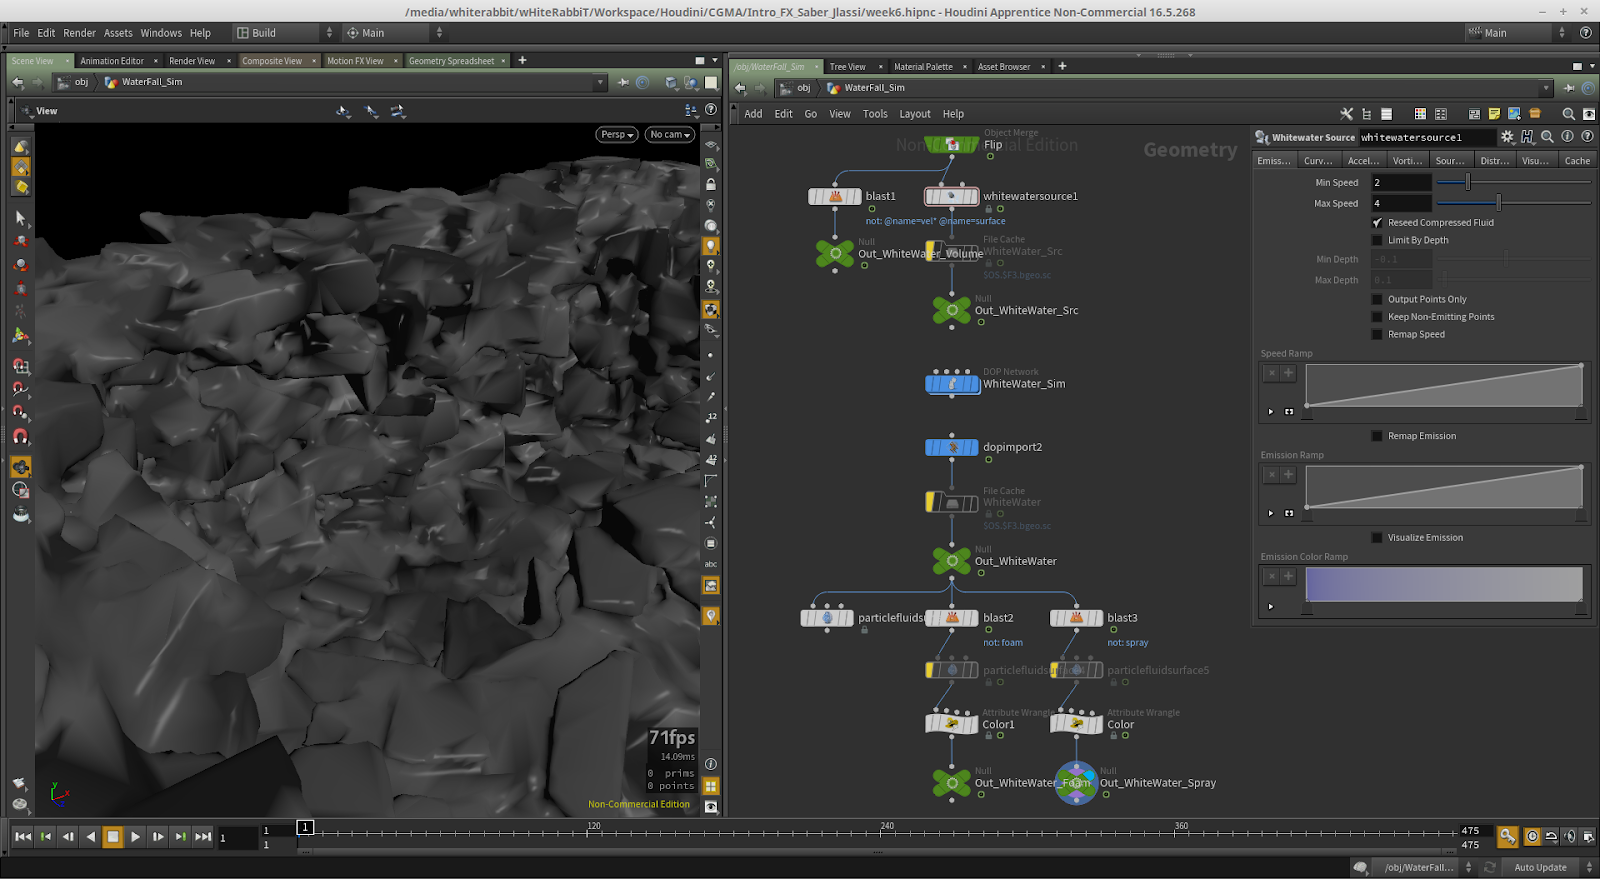
Because this geometry node wasn’t for rendering purposes, I then merged everything at the end just to have a simple preview on the viewport.
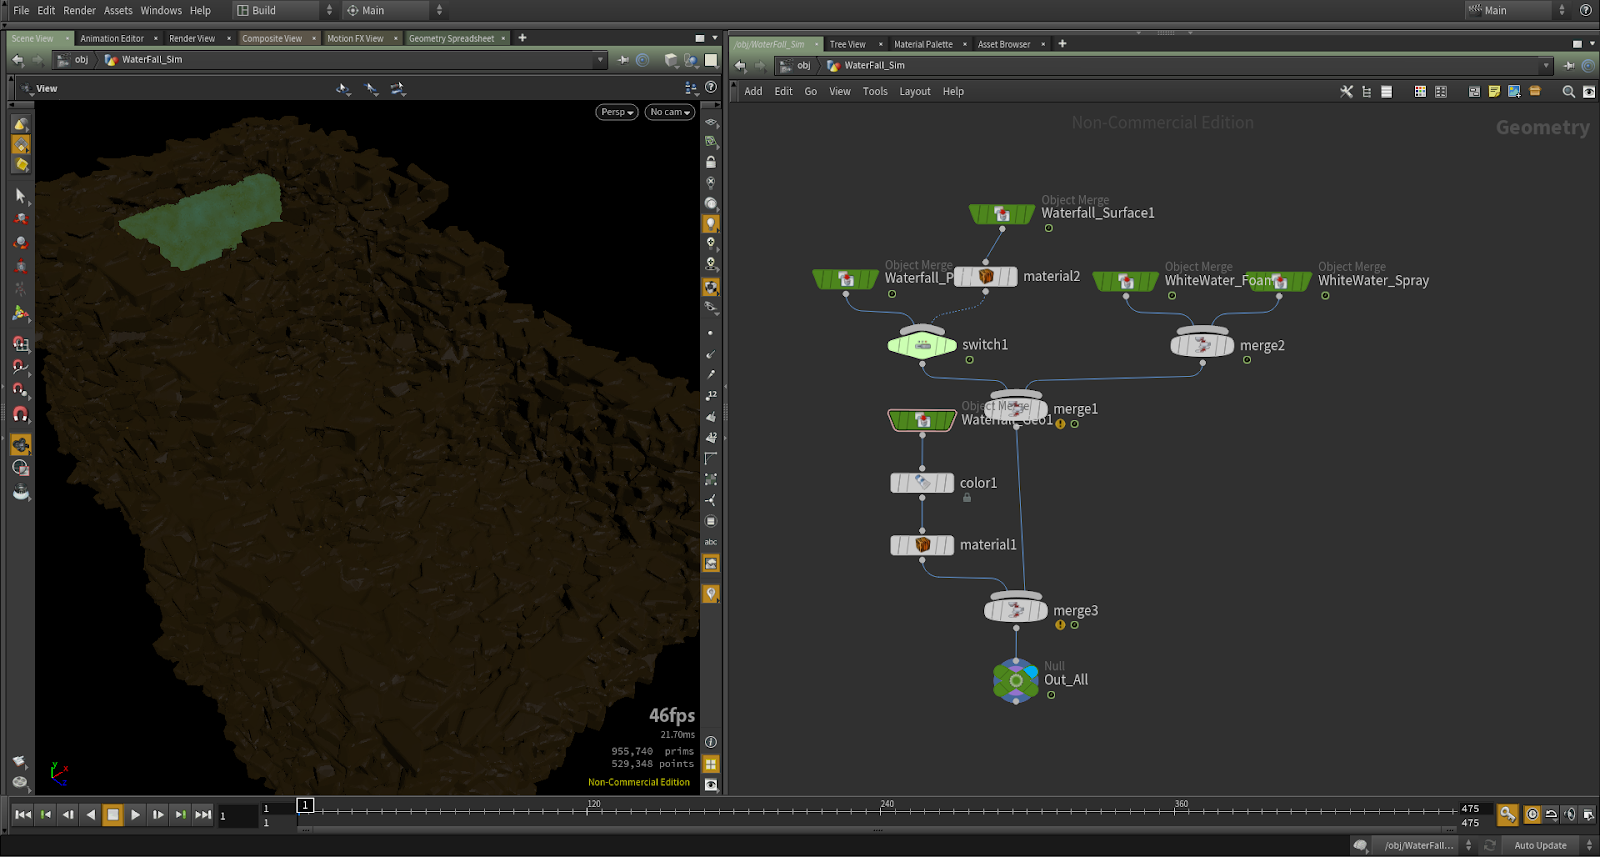
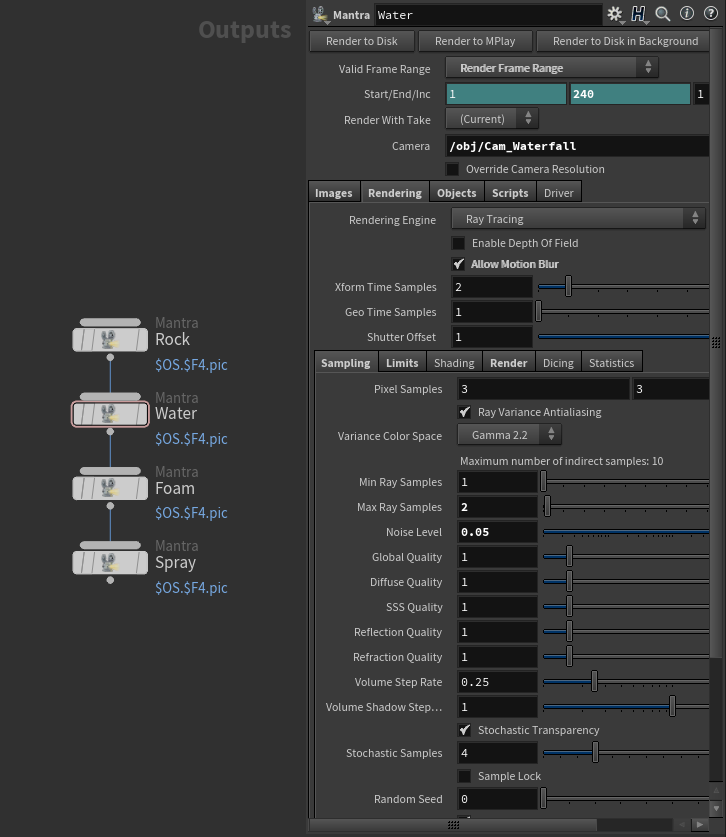
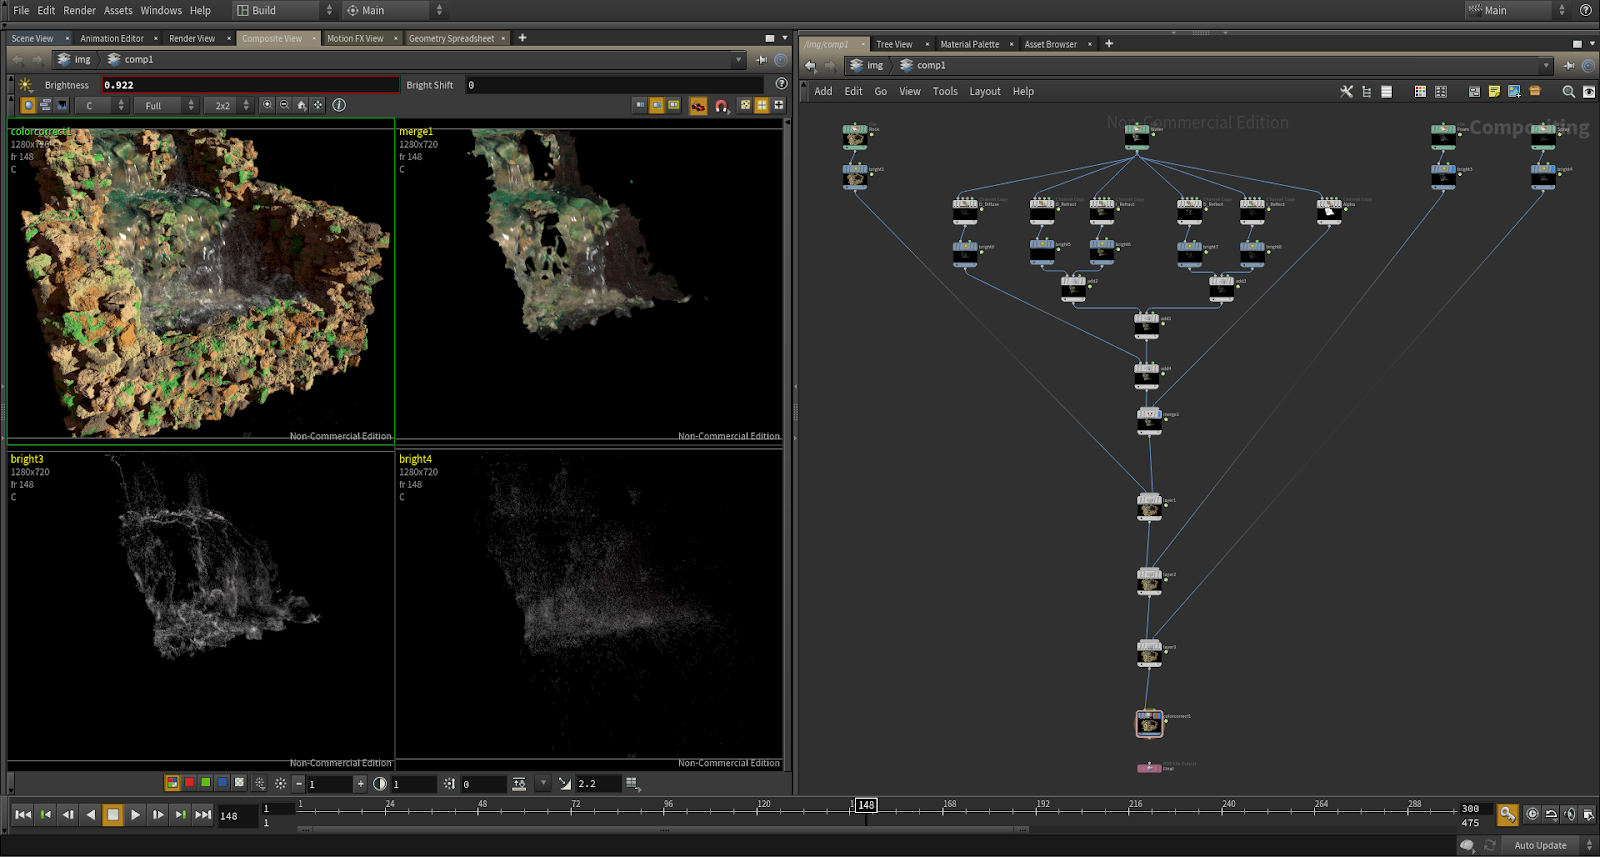
The water, the white water, the foam and the rocks were then separated into their own Geometry node, each corresponding to a new Mantra Renderer node.
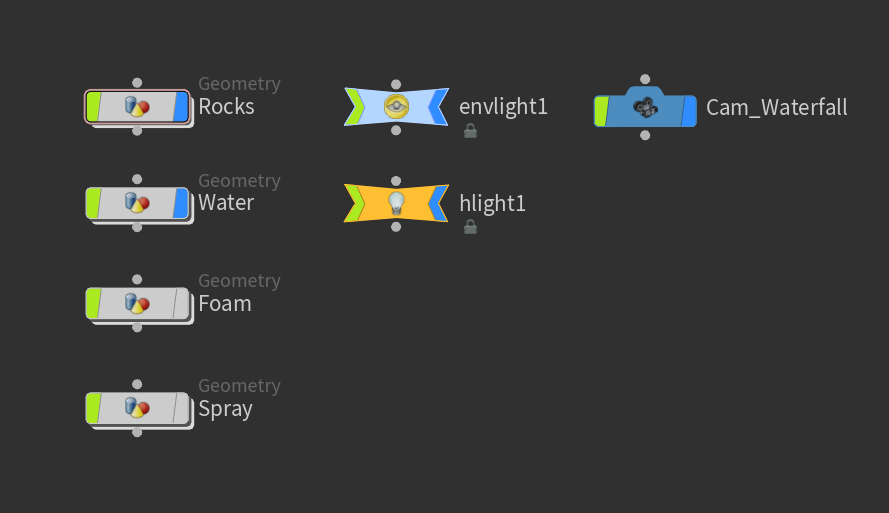
By doing so, we can tweak each renderer in order to be as precise and as fast as possible for each different kind of material.
For instance, because the rocks are not moving, we don’t need as many Pixel Samples as the water surface does. Same applies for the ray limit of reflection, refraction, diffuse, etc...
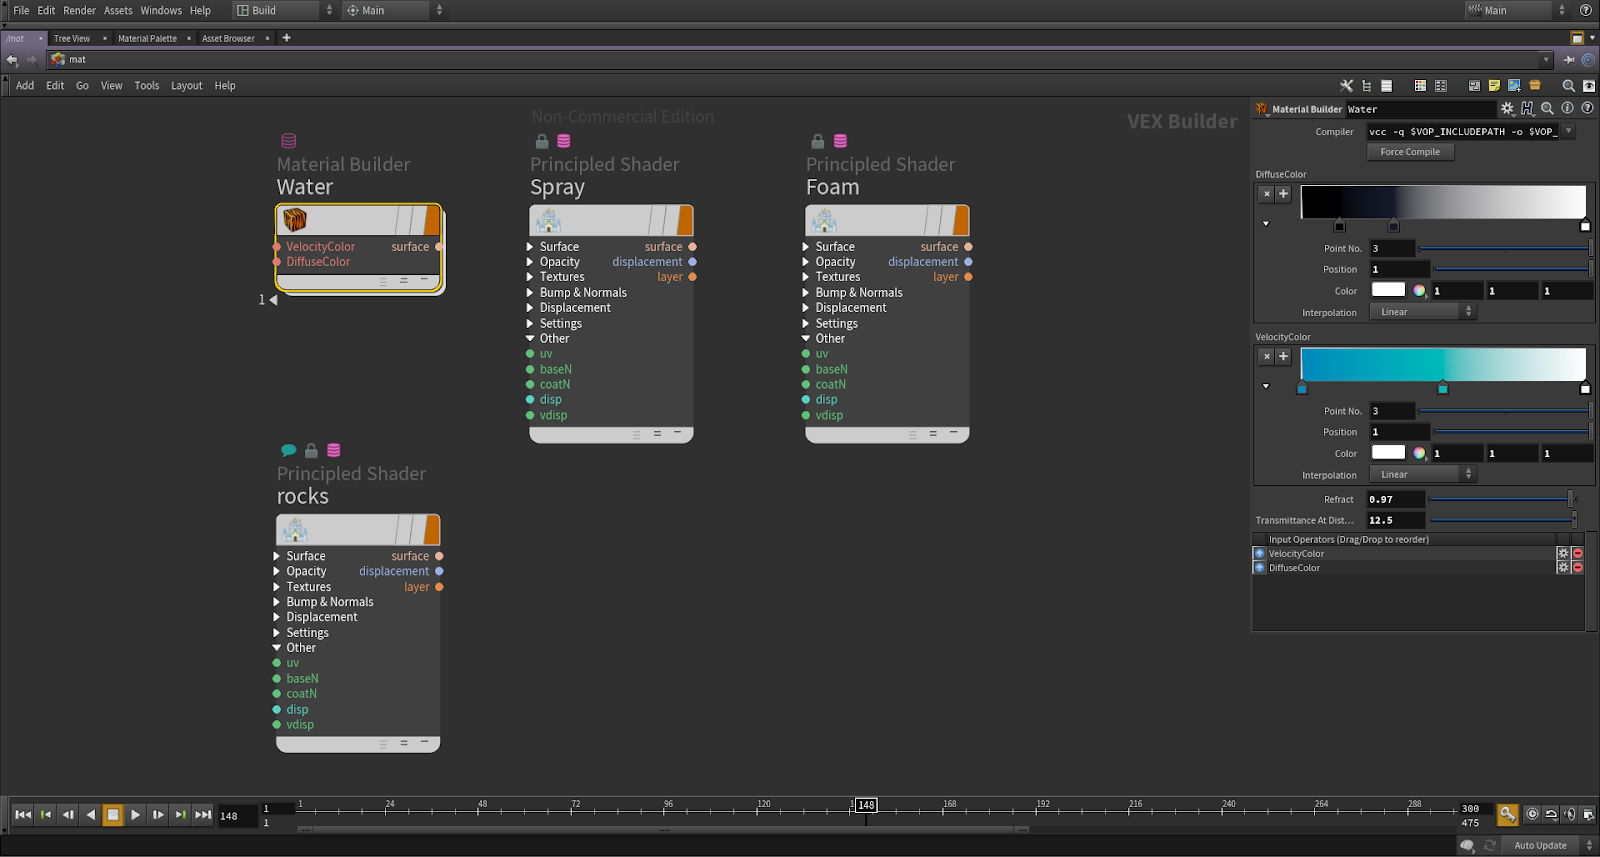
Except for the water surface for which I used a Material Builder node, the shading part is quite simple, and only use the PBR Principled Shader material.
For compositing purposes and flexibility at the end, I used differents AOVs (Arbitrary Output Variables) component for each render.
Those image plans give us the afterwise possibility to tweak any component like “diffusion from the environment light”, “refraction of the first light”, etc.
Can you explain to us how does it work in Houdini and what tools do you have to tweak and adapt this interaction to achieve a better artistic effect?
We have to setup the fluid simulation inside a DOP Network.
Most of the work will be computed by a FLIP Solver node which will need our Fluid Source and will react with our Volume Collision.
I didn’t change much in this node, just enabled Droplets and Add Vorticity Attribute (for further shader purposes).
The tweaking part mostly consists in playing with 3 properties of the Fluid Source: its size, its location and the Particle Separation value.
Finding the right Particle Separation value will affect the precision and details of the simulation, and therefore directly impact the simulation time cost.
Adjusting the size and location of the Fluid Source will change the flow.
Then comes iterations of “setting those parameters”, “re-simulate”, “create a Flipbook to have a good preview of the simulation behavior”, until we reach the right one.
The other DOP Network concerns the white water generation. Everything will happen inside a Whitewater Solver node, and besides enabling Spray and disabling Bubble, I didn’t change any other values.
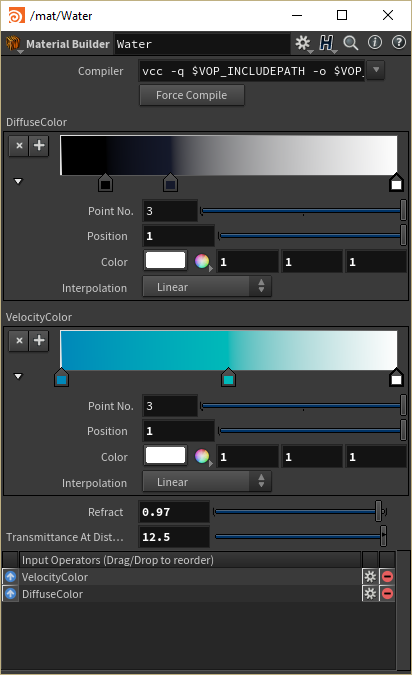
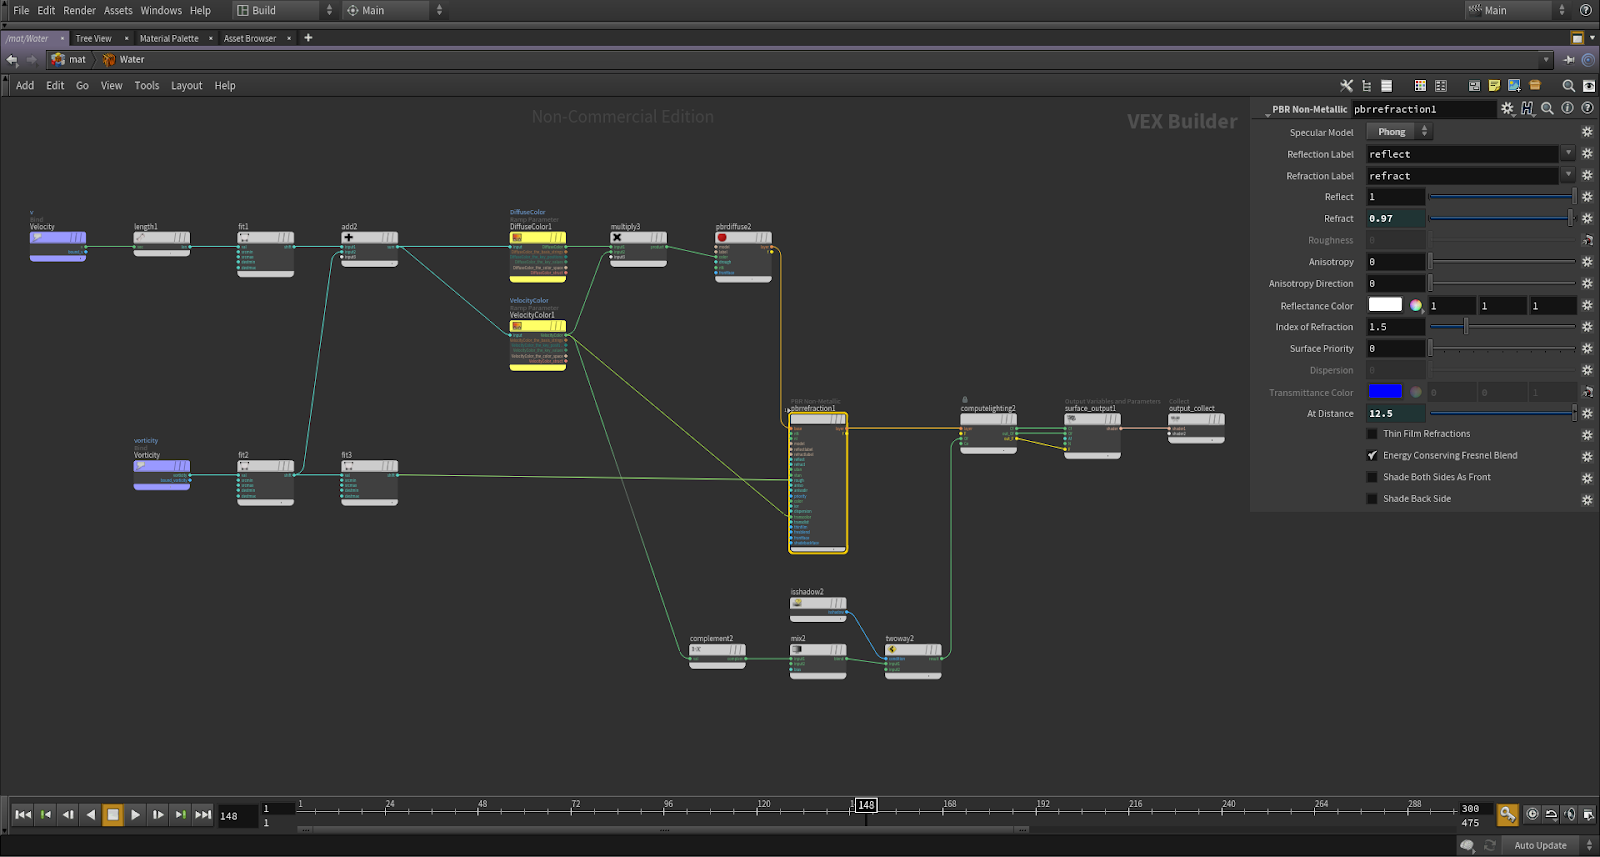
I used a Material Builder node for the shader of the water to speed up the renderer and have full control of what was processed.
For the color, I chose to use the Velocity and Vorticity attributes to alter the diffusion and transmittance color: the more the water is in movement the whiter it becomes.
This diffusion color is then directly used by a PBR Diffuse node whose result becomes the base layer of a new PBR Non-Metallic node which have reflection and refraction abilities.
The next step is to find the right Refract and At Distance values, controlling the amount of refraction (and because it is a PBR shader, this will change the contribution of the diffuse part) and transmision color influence.
I also used a Is Shadow Ray node to have a better projective shadow look.
Conclusion
What were some of the most interesting things you’ve learned here? And how do that help you achieve better visual effects in Houdini?
An interesting and very useful tip of the first week was about the collision: using a proxy Volume and choosing Volume Sample rather than the default Ray Intersect mode in a Static Object node, results in having a more accurate collision response in the simulation.
For the rendering part, the main tip would be to not only rely on Principled Shader but build our own from scratch to insure better performance and an easier material to tweak.
Do you see the potential of the Houdini usage with real-time spaces? Do you think these two would work well?
This is not really applicable here because this is more of a baked simulation, but Houdini can be very powerful for real-time space creation.
In addition to having this ability to create plenty of different assets by using procedural generation, Houdini is now compatible with Unity and Unreal and you can use Houdini Digital Asset (HDA) directly in them.
What did you have the most trouble with? What were the key things that turned out to be most challenging during production? How did you manage to cope with these problems?
When dealing with those kind of simulations and renderings, the hardest part is to reach the best realistic simulation and material shader as possible.
Which means that at some point you will have to increase the physics steps solver count, enhance the simulation definition, the pixel sample, etc, and so the simulation time will increase drastically, and the rendering time too, especially if you have a quite out-of-date computer like mine (knowing my computer limitation, the choice to make a pretty small simulation was clearly intended).
So we have to tweak the values with a less precise simulation, but keep in mind that sometimes, when we go back to the high resolution ones, the physics can have different and unexpected responses.
To speed up the shadering process, I always use a low-res Mantra node which possess light settings and only one light at a time.
What were the key takeaways from this class and your overall CGMA/CG Society experience?
This CGMA course was overall a really good experience. Having the possibility to exchange ideas with other passionate students and having some short deadline helped to reach the end of the projects.
Also, it is always very appreciated to get professional tips that have been tested in real production.